

by Rushendra Prasad
To read part 1 of this blog post, please click here.
This blog post discusses how to integrate Oracle BI server and make use of the existing Subject Areas built on RPD in Tableau desktop workbook as Data Source.
This is applicable for 8.2, 8.3, 9.0 and later versions.
Important: Tableau does not support or test third-party ODBC data sources like Oracle BI Server ODBC. Beginning with version 8.2.3, Tableau has made some important stability enhancements for unsupported third-party ODBC data sources such as Oracle Business Intelligence (BI) Server or Oracle Business Intelligence Enterprise Edition (OBIEE).Prerequisites
- OBIEE client to be installed to Open RPD using Admin Tool and make necessary changes to support this integration.
- Make sure you have permissions to create DSN for OBIEE server and server is reachable from the machine if connecting to remote machine.
- Tableau Desktop to be installed to connect to OBIEE Server DSN to make use of SAs as data source
Designing OBIEE RPD Layers to Support Making Joins in Tableau
The whole point of making the changes as described below is to allow Tableau to make joins between tables as we do in the physical layer.
Before accessing subject areas built on RPD in Tableau using ODBC, a few steps need to be taken in RPD using the OBIEE admin tool.
Open RPD Offline or Online. If the changes are offline, deploy the RPD to make sure the changes are available for Tableau when accessing using ODBC connection.
The following changes are done online to the RPD by connecting to the BI Server using OOTB Sample App Lite RPD
Create a System DSN to Connect to BI Server
To establish an ODBC connection to the Oracle BI Server for accessing RPD Online, you must install a copy of the Oracle Business Intelligence Developer Client Tools (available on the Oracle website).
We can use the same DSN even for connecting to Tableau using ODBC connections
After installing the client, follow the steps below to create a database source name (DSN).
- In Windows, open Run dialog box.
- Start the Windows ODBC Administrator tool by entering one of the following commands in Run dialog box:
32-bit operating system: C:\Windows\system32\odbcad32.exe
64-bit operating system: C:\Windows\SysWOW64\odbcad32.exe
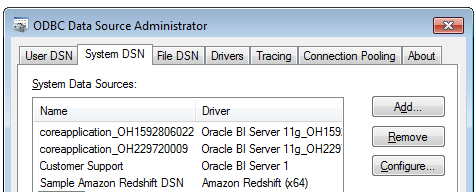
- In the ODBC Administrator tool, add a new System DSN for Oracle BI Server ODBC by following the below steps:
- On the System DSN tab, click Add.
- Select the Oracle BI Server DSN from the list of available drivers

- Enter a unique name for the connection which we will be using in both OBIEE and Tableau.
- Select Clustered DSN, for Primary Controller use the IP or Server host name hosting BI Server.
- For Port, enter the port number connecting to BI server, default values (9706) will work unless OBIEE is installed with custom Ports. Confirm with the OBIEE administrator for correct details.
- Click Test Cluster Connect to test your connection. Once successful click Next.
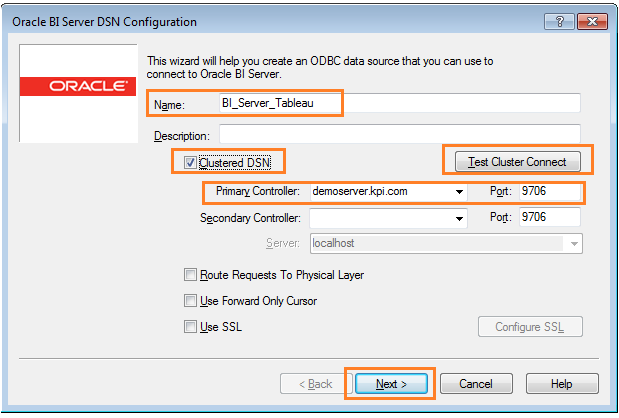
We can also use it without checking Clustered DSN as it enables Server Tab and we can enter the server name hosting OBIEE

- Click Next and enter Login ID and Password to connect to BI Server with Port as 9703 (cross check BI Admin for BI server port number if not default ports).

- Set Default Subject Area to Sample Sales Lite and click Finish.
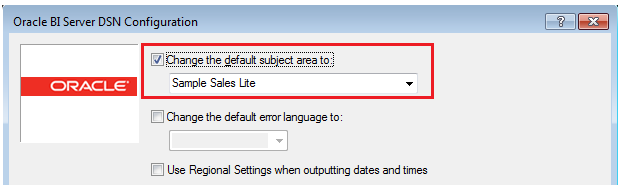
Important: You must select the subject area that you want to connect to in each ODBC connection you create. For example, if you want to connect to four subject areas, you need to create one ODBC Connection to each subject area for Tableau.
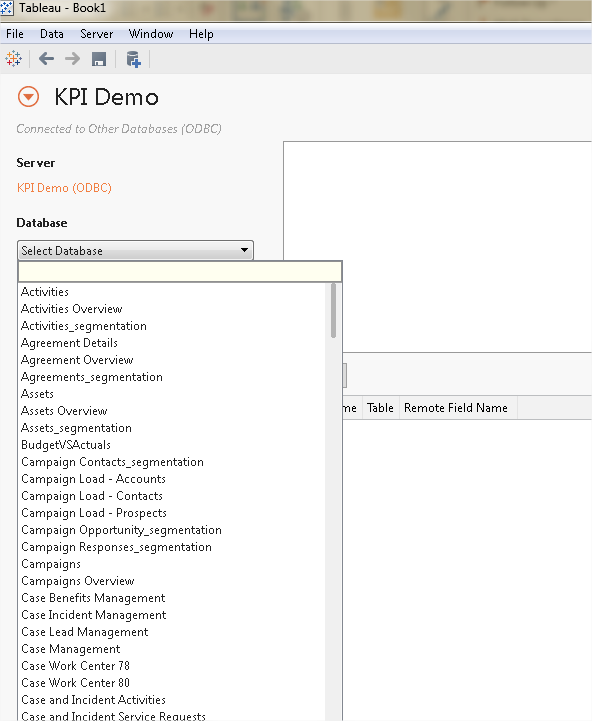
Because all presentation tables in the SA will be listed as a set of tables in alphabetical order instead of grouping them into SAs.
Below is a screenshot of the same in case of multiple SAs in RPD. To avoid this, we have to create individual DSN's for individual SAs.
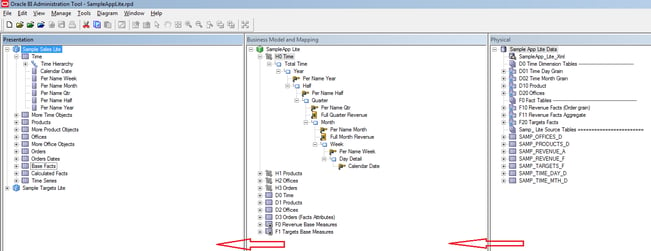
About OBIEE RPD
There are three layers in RPD as explained below:
Physical Layer (right pane) the layer where the connection to each data source is made and the raw tables are exposed. Joins across tables are done at this layer.
Business Layer (middle pane) the layer where data modeling and logical relations and hierarchy creation will be done.
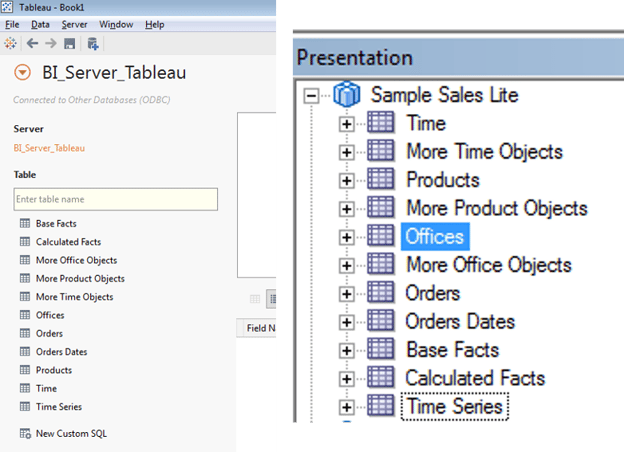
Presentation Layer (left pane) the layer that is exposed to the business through subject areas. These subject areas are neatly modeled to expose data in an easy to understand format.
In Tableau, you will connect to the tables in the presentation layer only as data sources.
Changes to the Existing OOTB Sample App Lite RPD
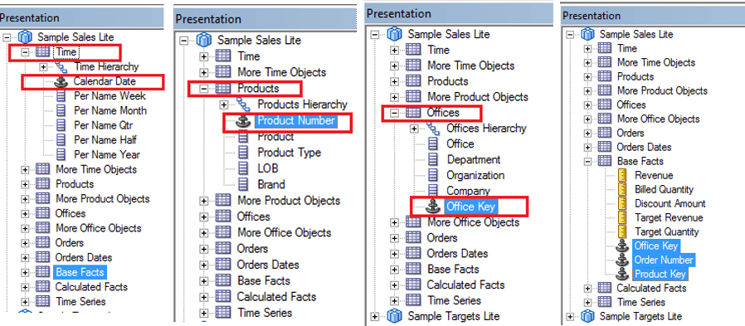
As shown in above screenshot, if we want to create reports in Tableau using the Sample Sales Lite Subject Area exposed in Presentation Layer.
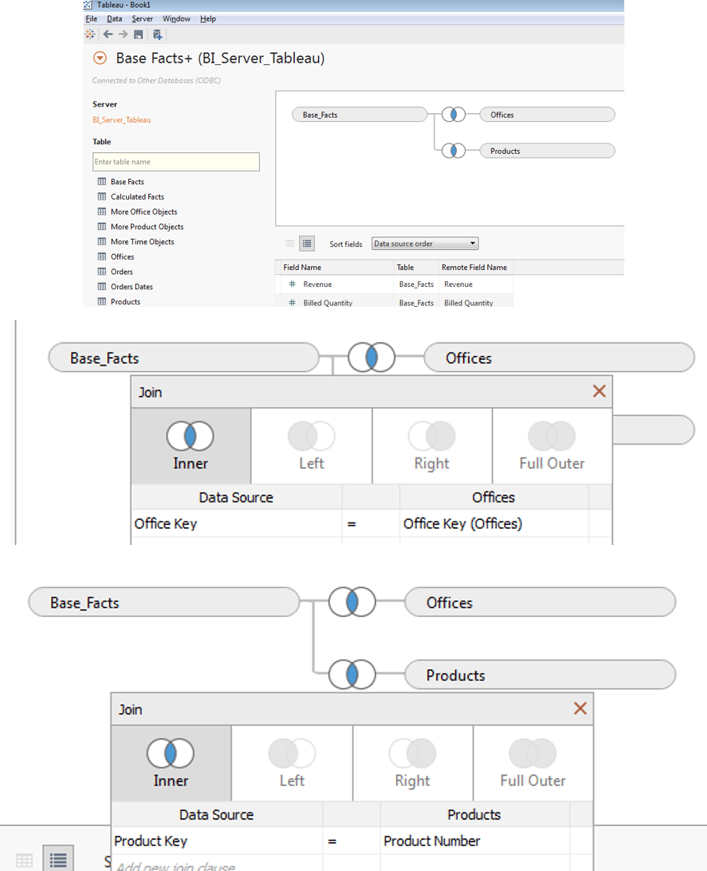
Suppose we need a report Total Sales by Product and by Time and By Office. We need to make a join with Time, Products, Office & Sales Fact Table in Tableau. To make a join between tables, we need Key columns (Primary Keys in Dimensions and Foreign Keys in Fact) also be exposed in BMM and Presentation Layer.
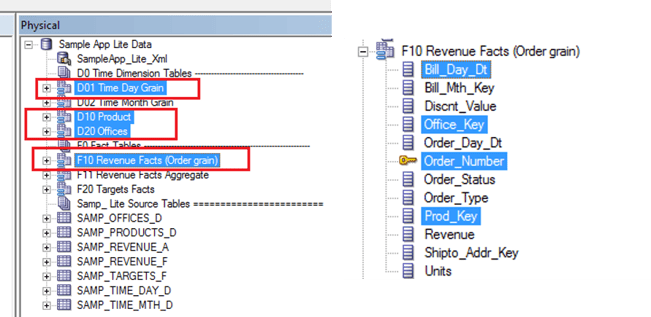
Step 1
Identify the Key Fields in Dimensions and Fact Table in Physical Layer of RPD. In our case it is as below
Time - Calendar_Date (Joined with Fact at Physical Layer with Bill_Day_Dt)
Products - Prod_Key
Office - Office_Key
F10 Revenue Facts (Order grain) - Prod_Key, Office_Key, Order Number & Bill_Day_Dt
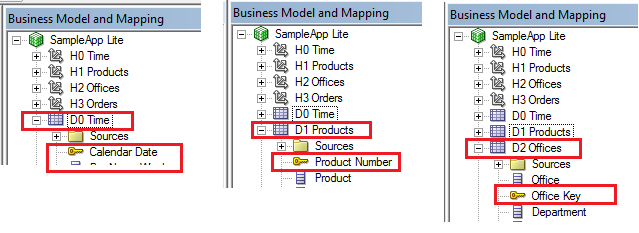
Step 2
Expose the above-mentioned Key columns to respective logical tables in the BMM layer. Do not expose if any of them are already exposed, as Primary Keys will be exposed to Logical Tables as part of Design. Need to take care of exposing foreign keys in the fact table.
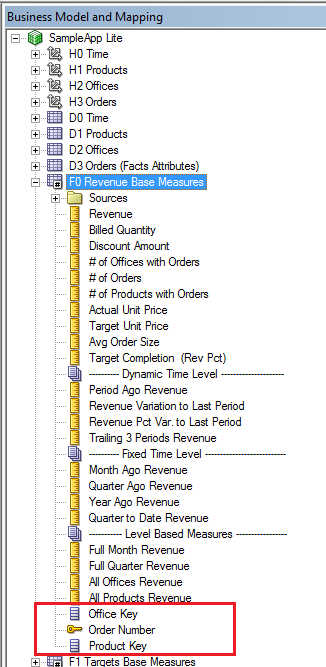
Step 3
Expose the same keys to respective Presentation tables in presentation layer of Sample Sales Lite Subject Area.
Step 4
Save the RPD
Create a .tdc File
Create a Tableau data source customization (.tdc) file to connect Tableau Desktop to an Oracle BI server. To do this, follow these steps:
- Open a text editor and paste the following code into it:
<connection-customization class='genericodbc' enabled='true' version='9.3'>
<vendor name='Oracle Business Intelligence' />
<driver name='Oracle BI Server 1' />
<customizations>
<customization name='CAP_SET_ISOLATION_LEVEL_VIA_ODBC_API' value='no' />
<customization name='CAP_SUPPRESS_DISCOVERY_QUERIES' value='no' />
<customization name='SQL_CATALOG_USAGE' value='0' />
<customization name='SQL_SCHEMA_USAGE' value='0' />
<customization name='CAP_FAST_METADATA' value='yes' />
</customizations>
</connection-customization>
In the above code, version is very important, change the version as your Tableau desktop version. In my case it is 9.3.
- Save the .tdc file in the correct folder:
- For Tableau Desktop on Mac: /Users/<user>/Documents/My Tableau Repository/Mapsources
- For Tableau Desktop on Windows: My Tableau Repository\Datasources
- For Tableau Server: Program Files\Tableau\Tableau Server\<version>\bin
Important: Tableau does not test or support .tdc file Use a .tdc file only to explore or occasionally address issues with your data connection. Creating and maintaining .tdc files requires careful manual editing, and there is no support for sharing these files.
Connect to Oracle BI Server ODBC from Tableau Desktop
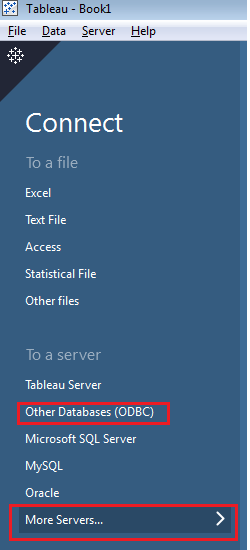
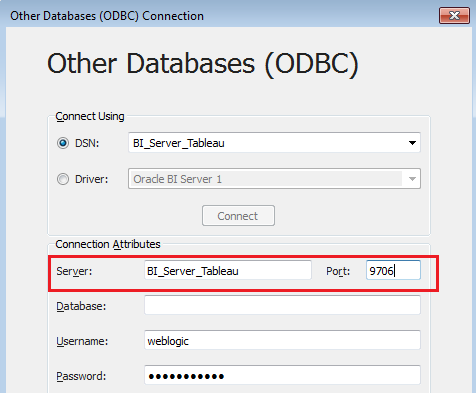
- Open Tableau Desktop, click Connect to Data Sources -> select Other Data Sources (ODBC).
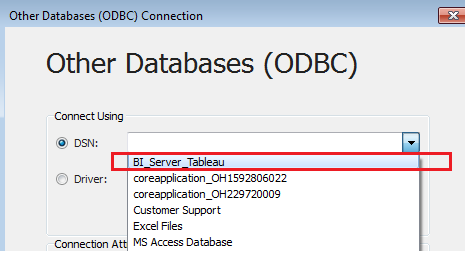
- In the DSN tab, select the BI_Server_Tableau DSN that we have created.
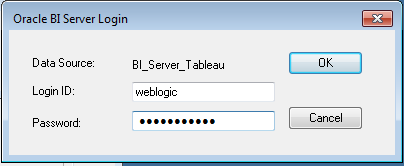
- Provide login details to connect to BI server to connect through ODBC connection and import tables available in RPD Subject Area into Tableau as data source.
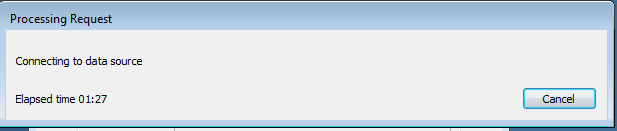
- Provide Connection attributes once enabled. Provide any name for server and port as 9706, same as port we provided while creating DSN.
- Once the connection is made, we can see the list of tables available in Sample Sales Lite presentation layer in alphabetical order.
- Drag the tables to make joins as needed using Key columns available in the presentation tables.
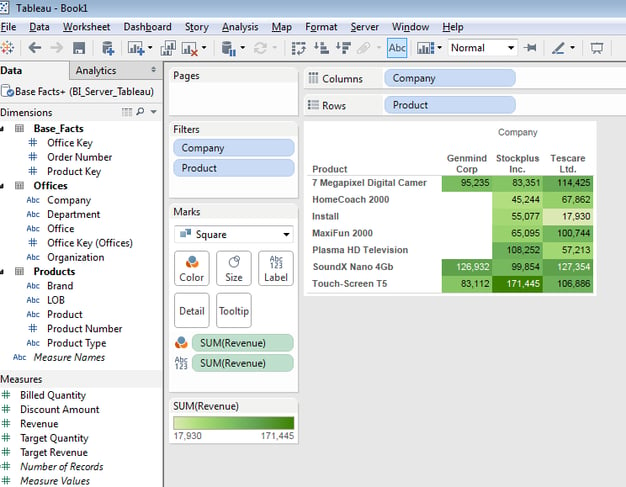
We are good to go and create reports based on the available joins. Click on Sheet1 in Tableau.
- We can hide the Keys that are exposed in presentation layer in Tableau. Select the key columns and right click Hide.
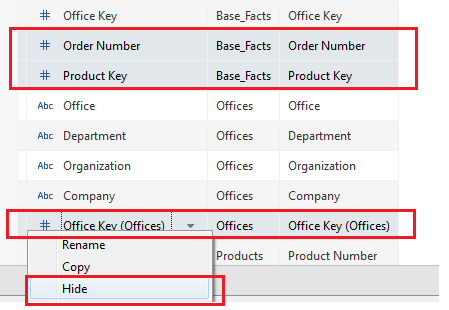
- As expected, all columns will be arranged on respective tables and all measures will be placed in Measures in Data Tab.
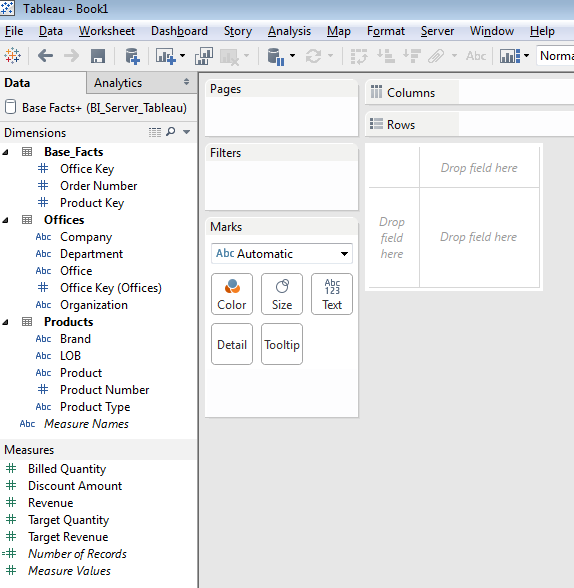
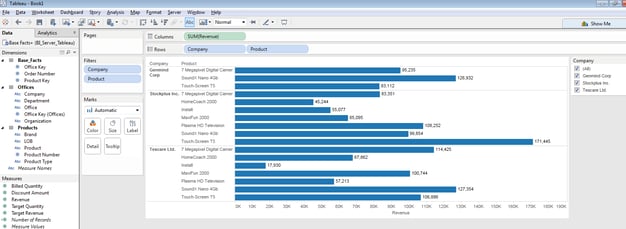
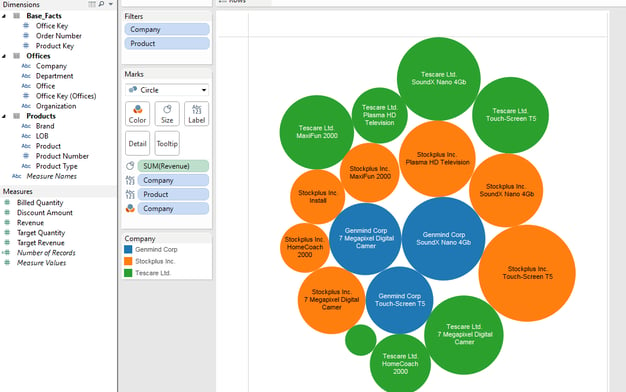
- Create a report by dragging columns from Product, Offices and Measure columns.
Note: Most of the features can be availed Tableau does not support any issues with this connectivity.
Source: Tableau KB and Real-Time Implementation
Check out our case studies to see how we've helped our clients:
Networking Hardware Company
Williams Sonama
Masterlock
Twist BioScience
Do you enjoy the solving technology problems and helping people meet their data analytics challenges? Maybe you would be a good fit for our team. See our job openings.


Comments
Comments not added yet!