This blog post is intended for those who are familiar with OBIEE or have previously worked on it. It contains step by step instructions on how to setup OACS using a trial account.
What is OACS?
Oracle Analytics Cloud Service (OACS) is a new Platform as a Service (PaaS) offering comprehensive analytics capabilities at any scale, in any environment, and on any device. This was first announced on Sep 30, 2014 at Oracle OpenWorld and was officially launched on Apr 4, 2017.
It is available in two editions (Standard and Enterprise)
- OAC Standard includes Oracle Data Visualization Cloud Service (DVCS), Oracle Smart View and Oracle Essbase Standard
- OAC Enterprise includes all the services in the Standard edition plus Oracle Business Intelligence Cloud Service (BICS), enterprise capabilities for Oracle Essbase and Oracle Day by Day
Pricing: https://cloud.oracle.com/en_US/oac/pricing
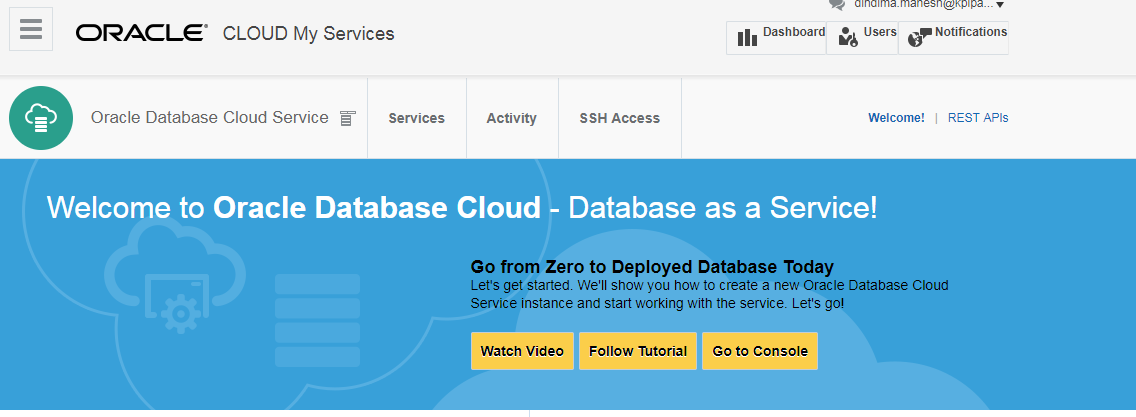
OACS Setup Process
Create an Oracle Cloud account at https://cloud.oracle.com/tryit to access the 30-day free trial for OACS.
Once the account is created, you will be redirected to the following link: https://myaccount.cloud.oracle.com/mycloud/faces/trialsignup.jspx?serviceType=IAASMB
Provide the details and click Request Code
Enter the code you receive via SMS
Click Sign Up to redirect to the following page
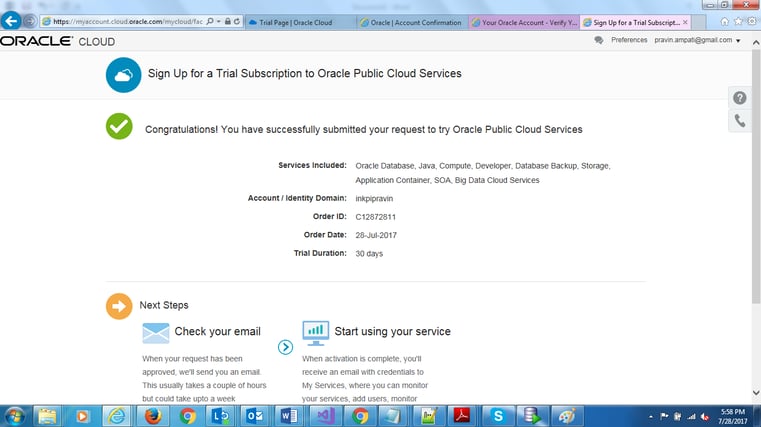
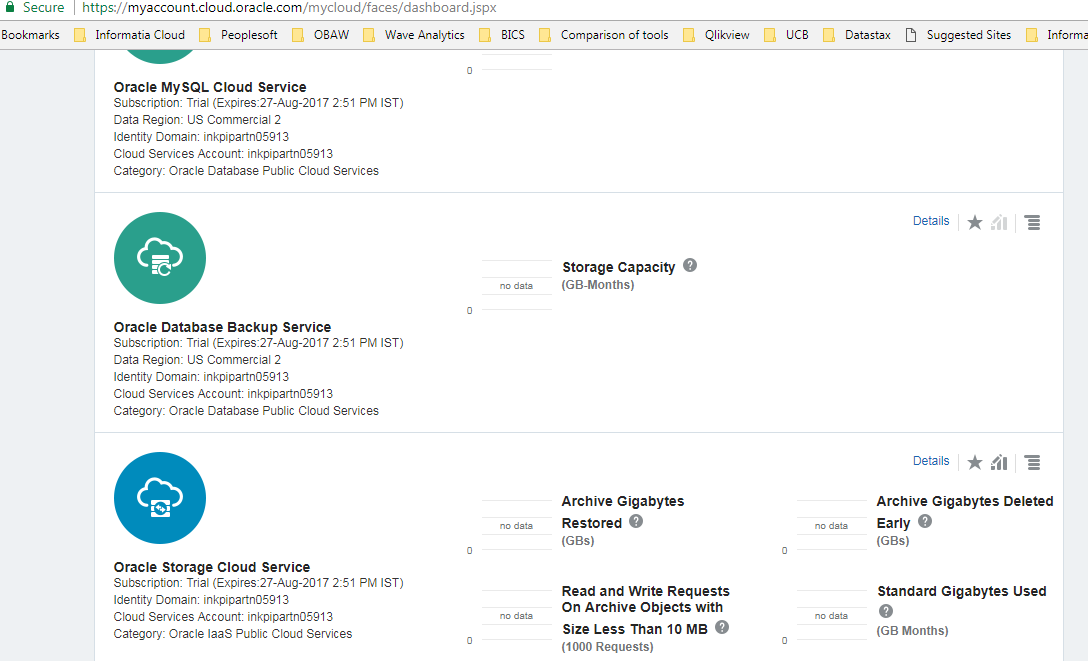
Check your inbox for an email with a temporary password to access OACS. This password can be changed after you login by clicking the link in the mail. The email will have the details of all the subscriptions a cloud account is given access to.
Prerequisites: Have a storage container and database cloud before setting up OACS
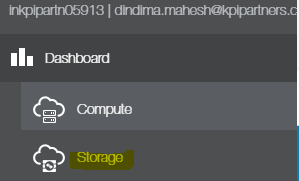
Creating Oracle Cloud Storage Service
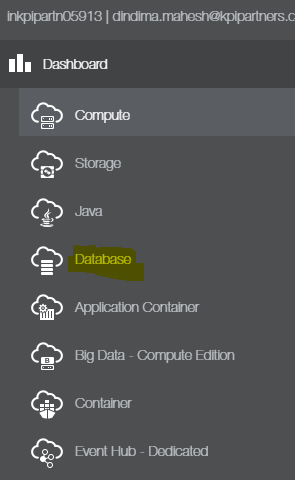
Click Menu to display the list of services
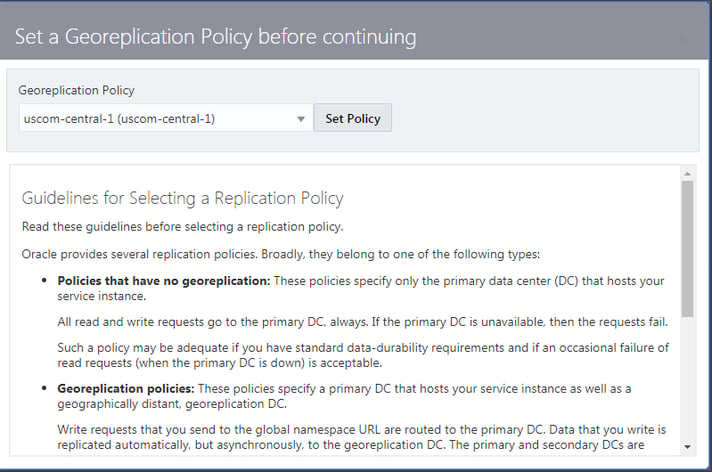
Click Set Policy to set a Georeplication Policy before you continue
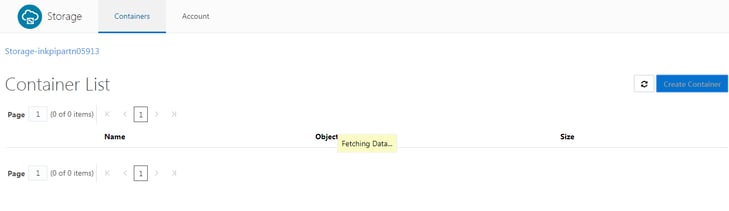
Click Create Container to fetch the details required for service creation.
Domain name is inkpipartn05913
Storage service is Storage (by default)
Click Create Container
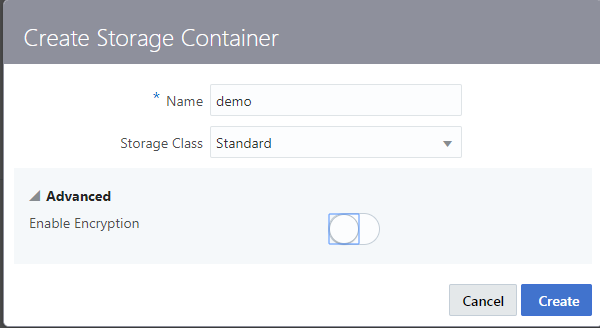
Enter storage container name In this case it is demo
Select the storage class (Standard or Archive)
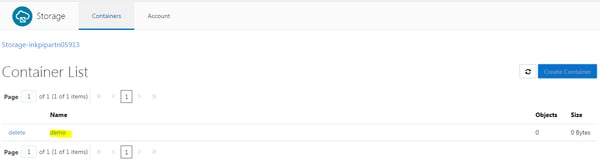
In order to reference Oracle Cloud Storage, use this format: <storage service>-<identity domain>/<container>
In our example, it is Storage-inkpipartn05913/demo
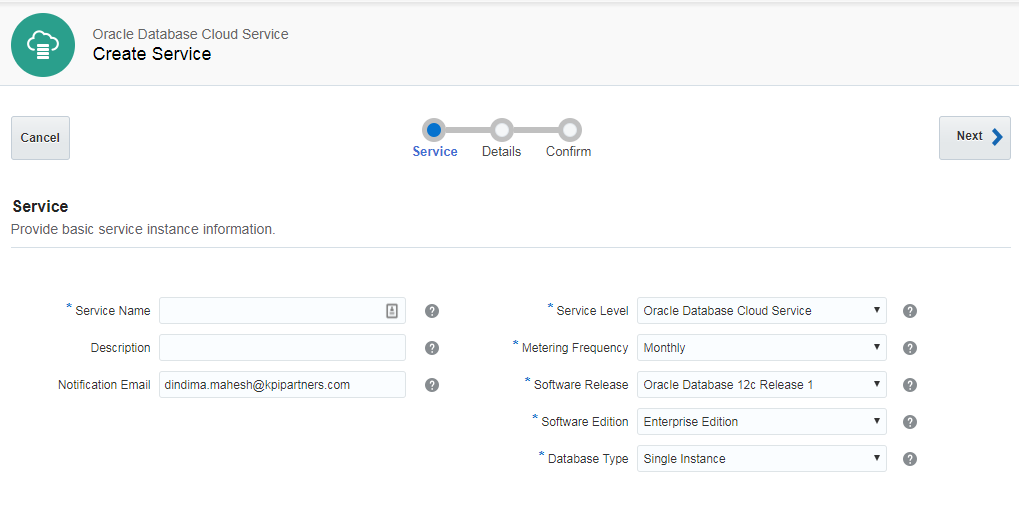
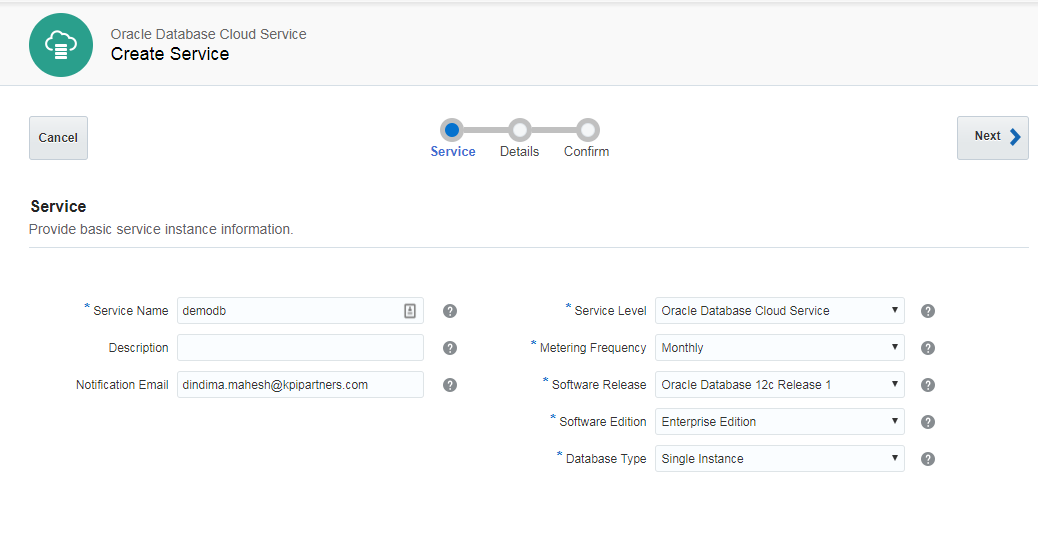
Creating Oracle Cloud Database Service
Click Menu to display the list of services
Click �Go to Console� and then �Create Service� to create the database service
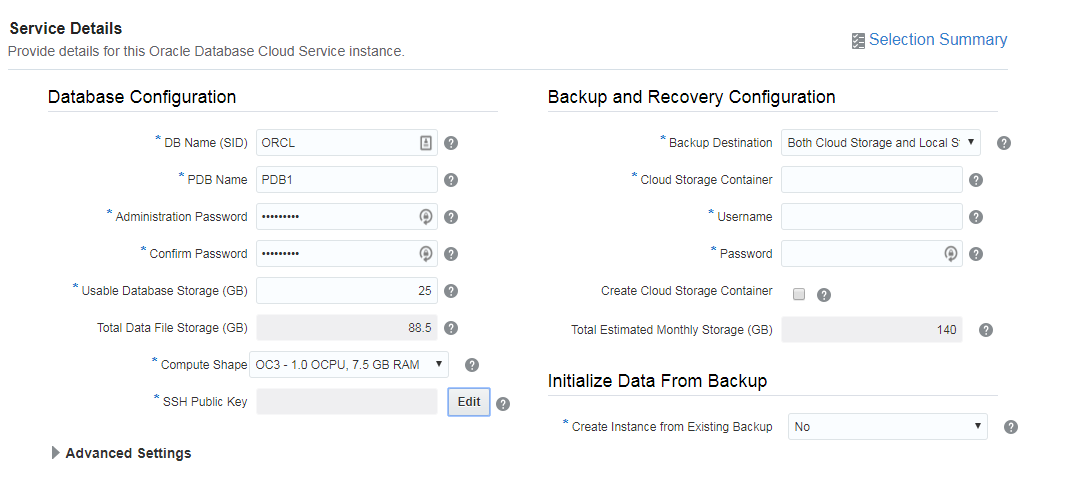
Confirm your password and click Edit in the SSH Public Key field
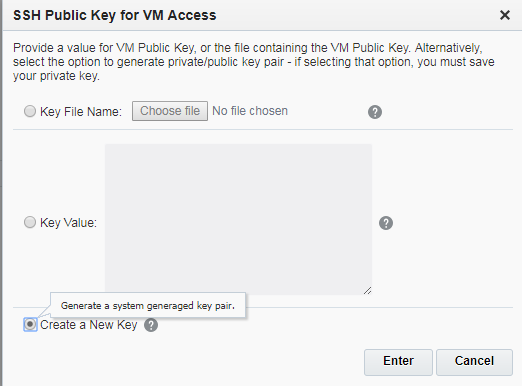
Select Create New Key and click Enter

Click Download to download a file with the filename sshkeybundle which contains the public and private key
Cloud storage container is
https://inkpipartn05913.storage.oraclecloud.com/v1/Storage-inkpipartn05913/demo
You will get the above value (cloud storage container) from My Account > Services in the REST Endpoint
Click My Account to redirect to the following page and then click Oracle Storage Cloud Service

Continue with the Database Cloud Service setup and select None as the Backup Destinantion
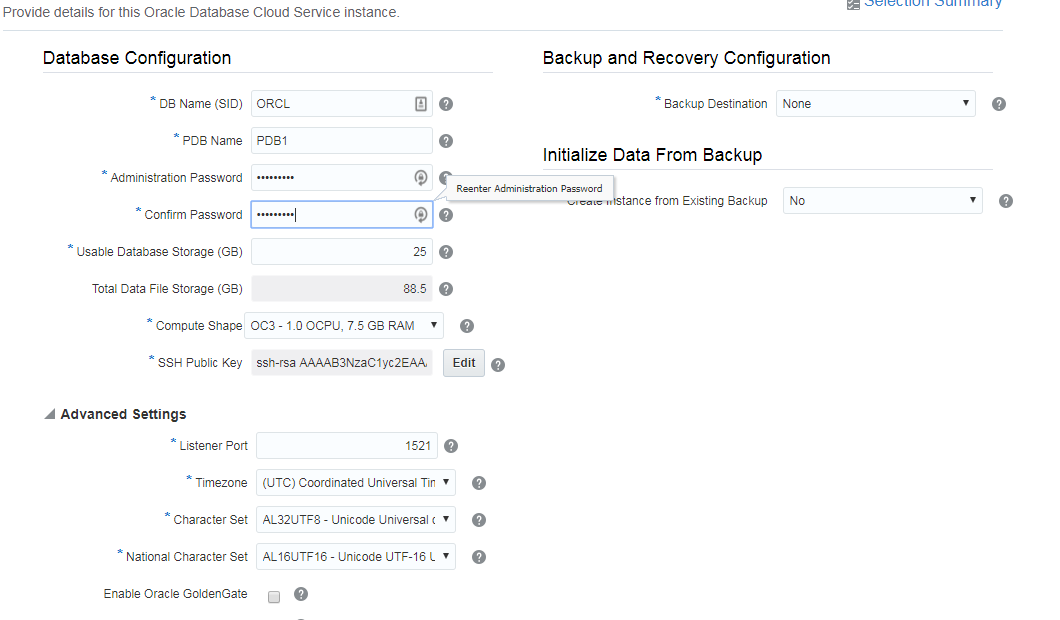
Click Next to display a summary of Database Configuration
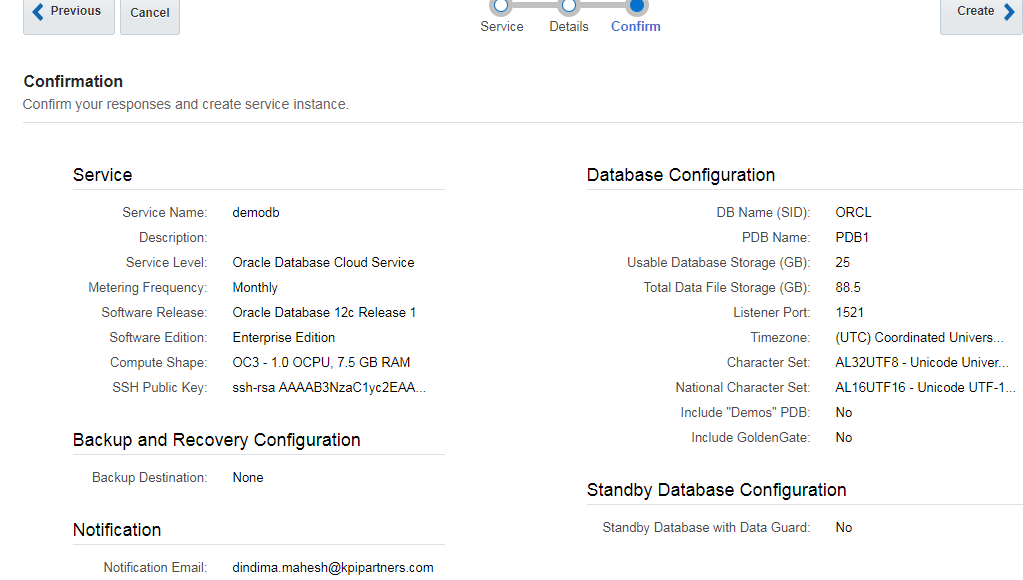
Click Create and you will get a Creating service message while the service is getting created
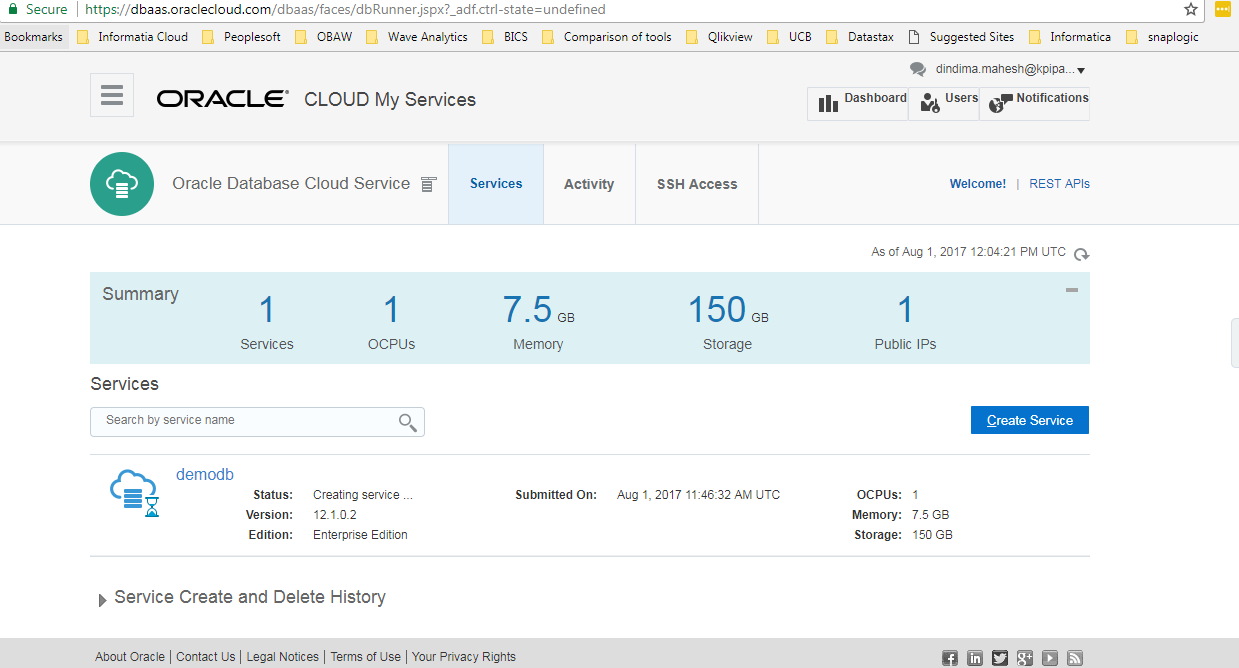
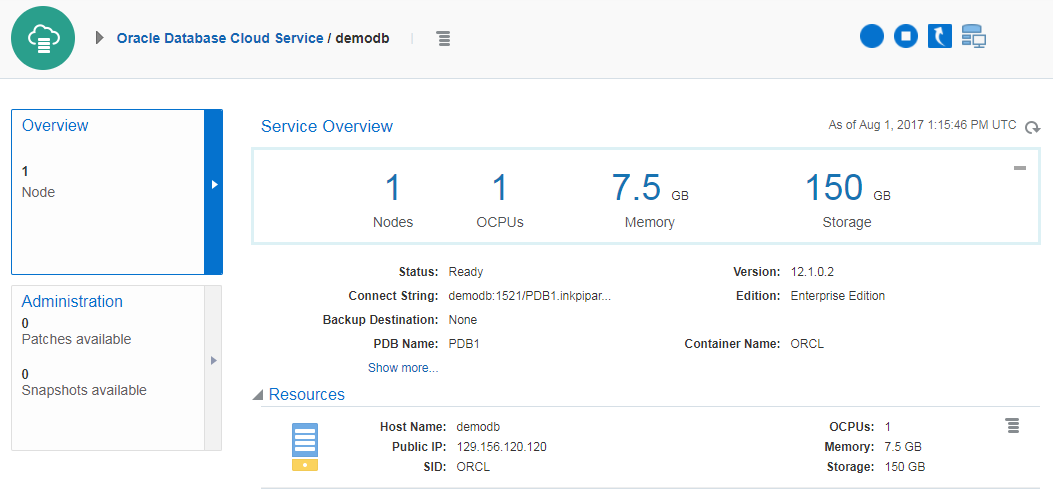
Once the service is created, you will see the following information and receive an email
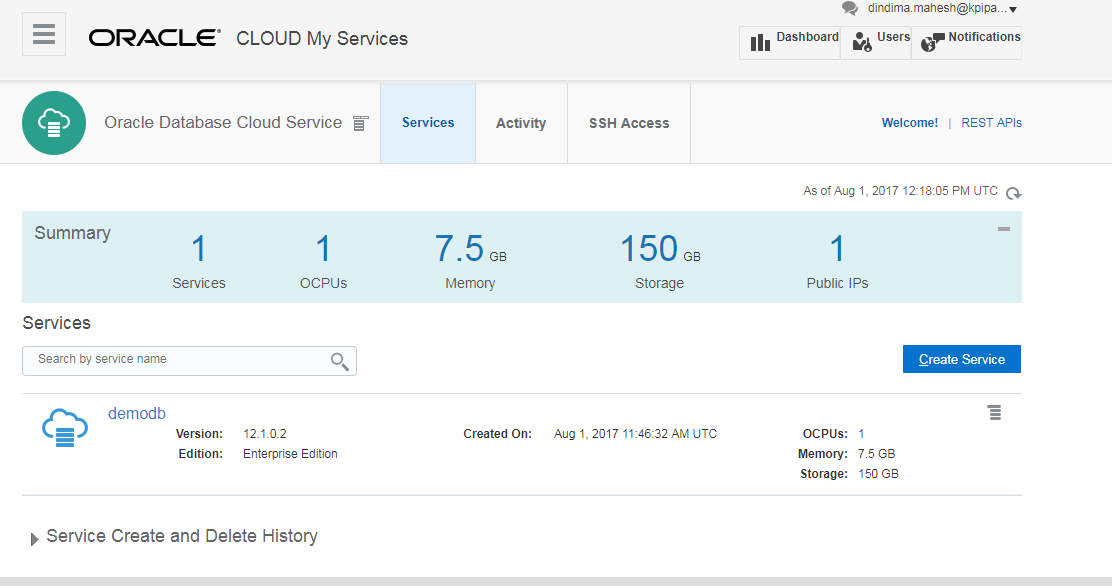
Click demodb for details
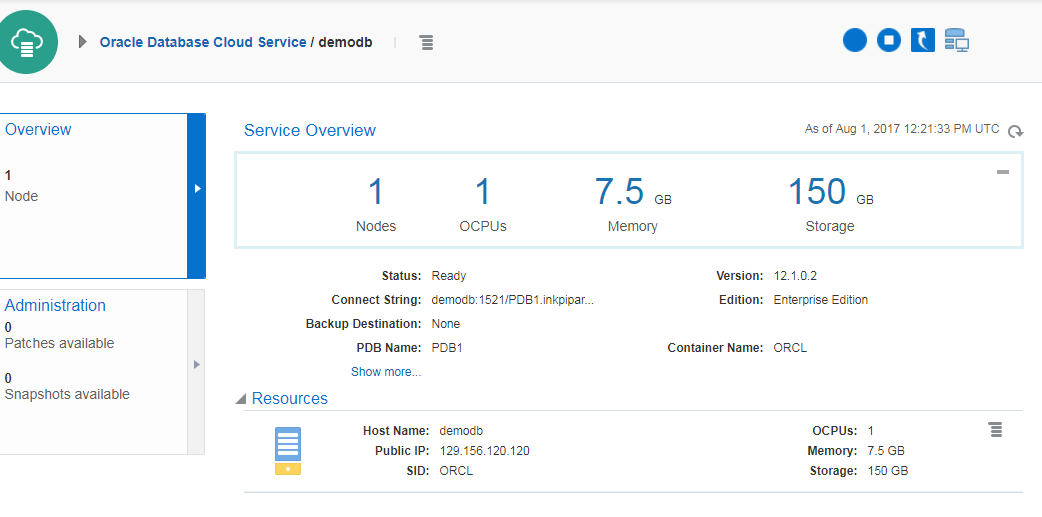
You can see the Public IP of db which can be accessed through PUTTY
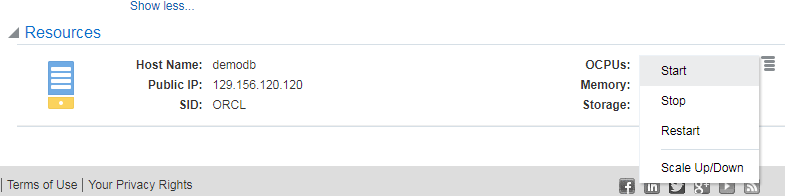
You can start and stop db as shown below

Or
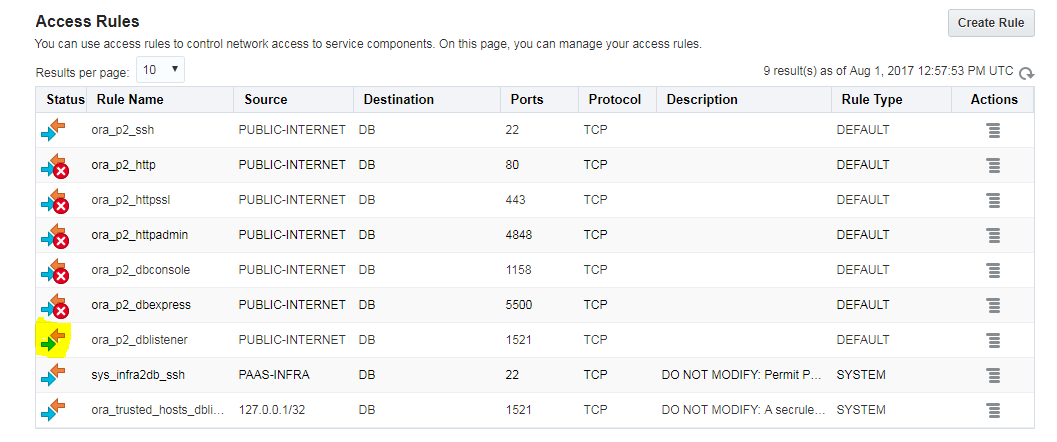
When a database service instance is created, a number of Oracle Compute Cloud Service access rules are created, but set to a disabled status. When you enable one of these predefined access rules, the given port on the compute node is opened to the public internet.
The access rules created for a db are shown below
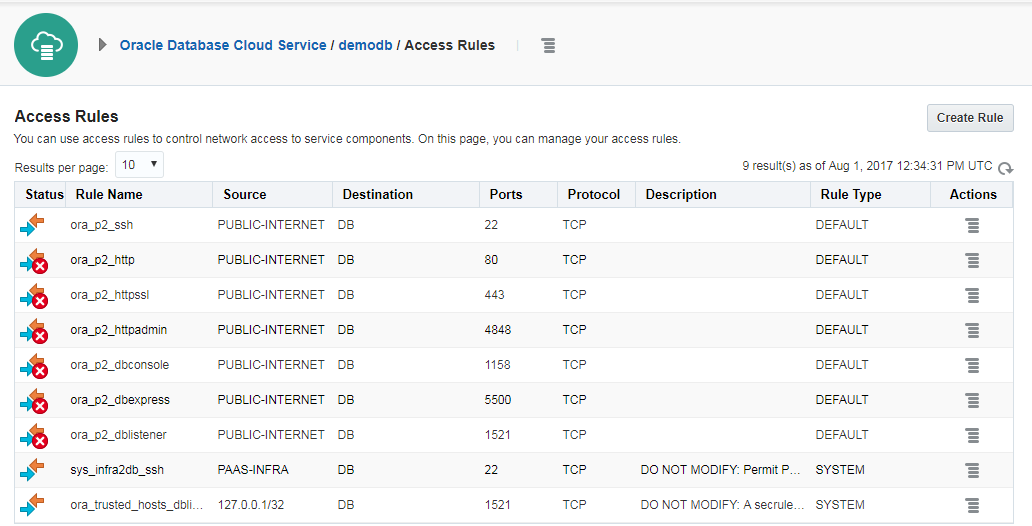
In order to use SQL Developer and the Oracle Cloud on-instance database monitor (DBaaS Monitor) in this tutorial, you will enable two predefined rules:
ora_p2_dblistener, which controls access to port 1521, the port used by SQL*Net, and therefore SQLDeveloper.
ora_p2_httpssl, which controls access to port 443, the port used for HTTPS connections to the instance including DBaaS Monitor.
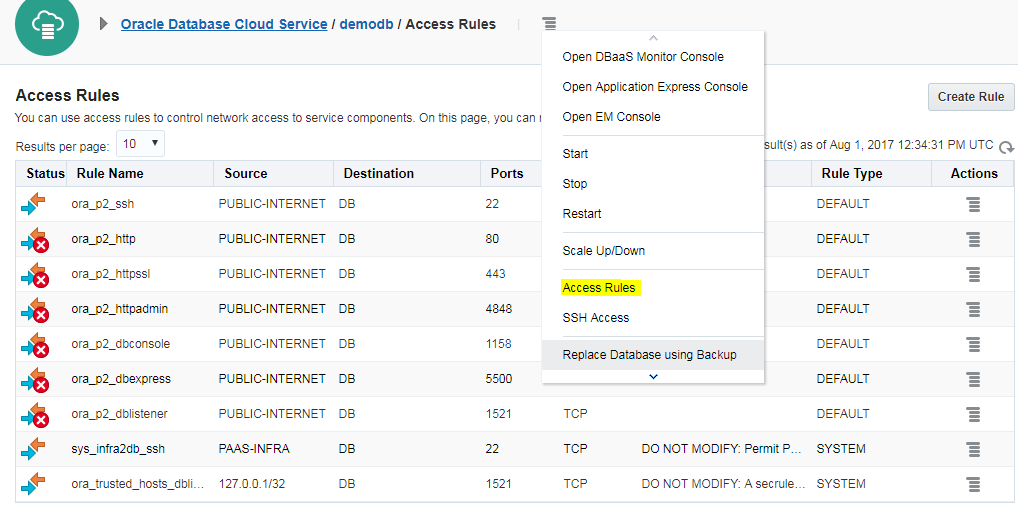
To enable these two automatically created Oracle Compute Cloud access rules from the Database Cloud Service console, click the hamburger menu beside the service name.
A list of access rules and their enabled status is displayed. You can create, delete, and update access rules from this page. By default, only the ora_p2_ssh and ora_trusted_hosts_dblistener access rules are enabled.
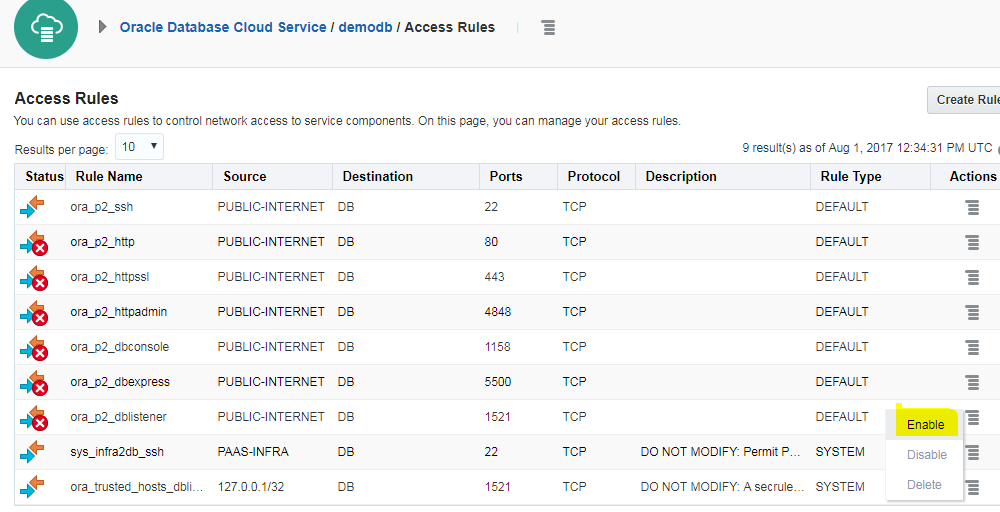
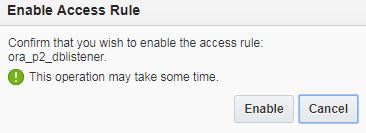
Click �Enable�
Likewise enable ora_p2_httpssl for DBaaS monitor access
Connecting SQL Developer to your Cloud Database
If 11g is selected during db setup then SID is needed else service name needs to be given as shown below
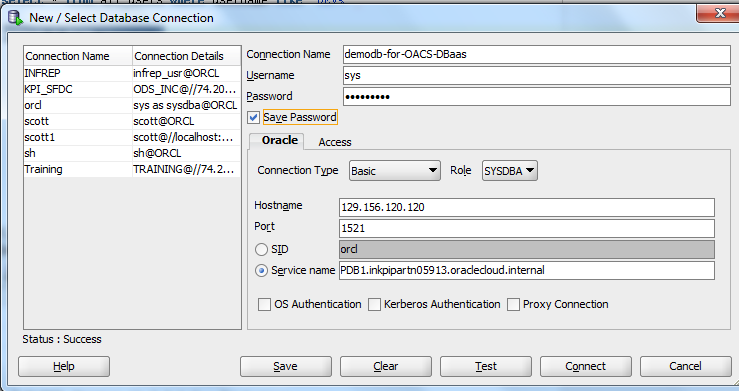
We get the service name upon hovering the mouse on Connect String as shown below
Different users created in demodb connection can be viewed under Other Users
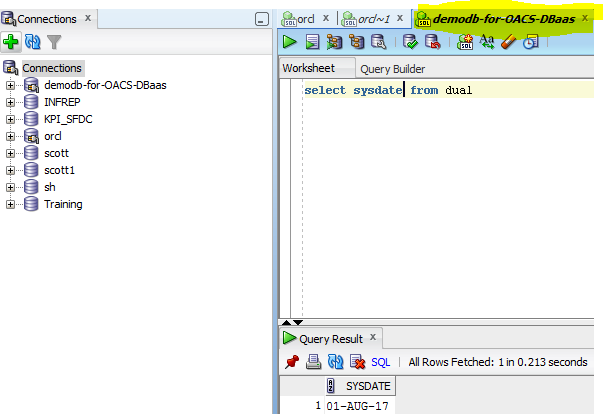
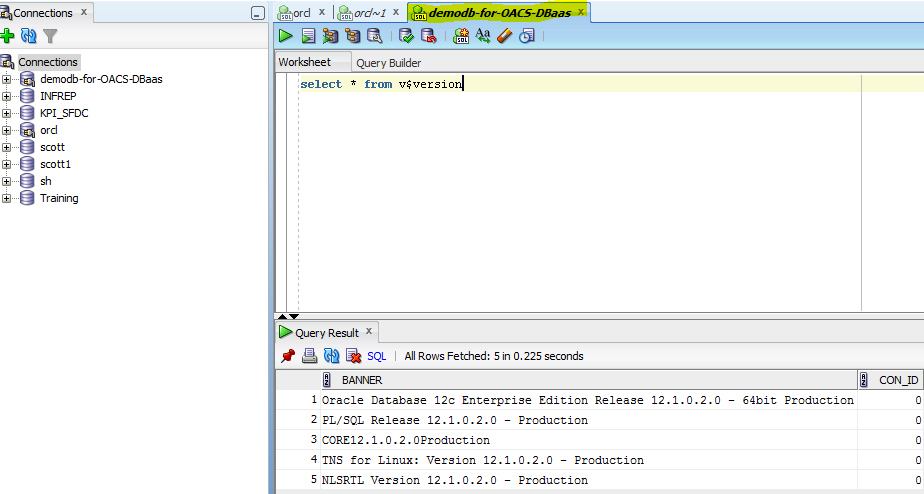
This database can be used just like any regular database.
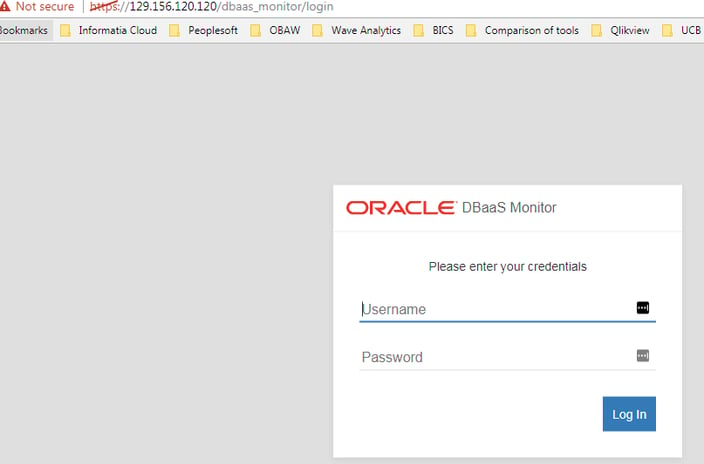
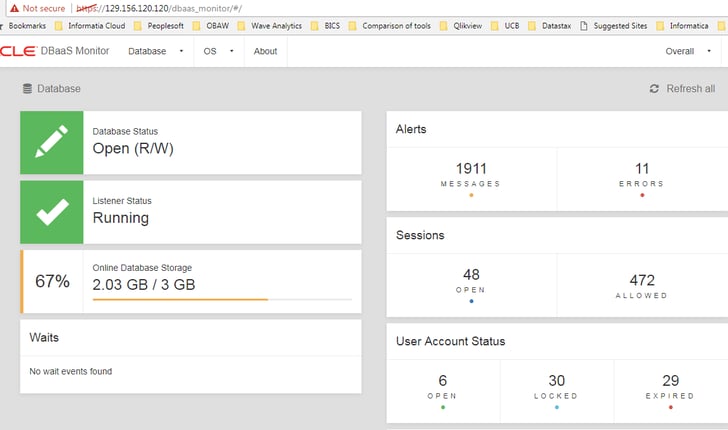
Use DBaaS Monitor to monitor Oracle Database Cloud Service and the database instances in it. You connect to the Monitor via Port 443 of your DBaaS VM. This port was opened earlier by enabling the access rule ora_p2_httpssl.
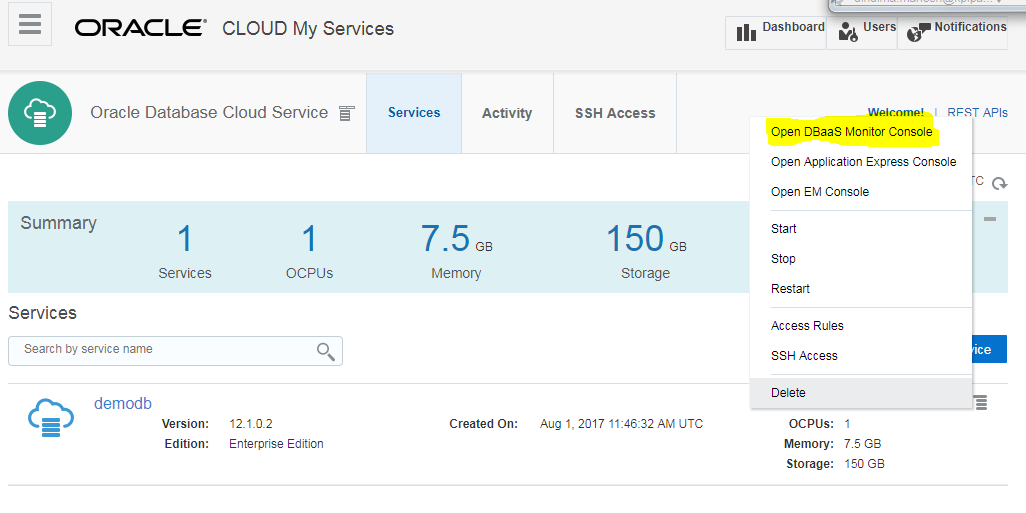
From the My Services console, return to the Database Cloud Service console.
Click the menu next to the database instance you wish to monitor and note the variety of console choices. Click Open DBaaS Monitor Console.
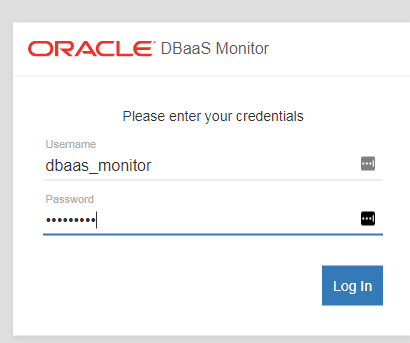
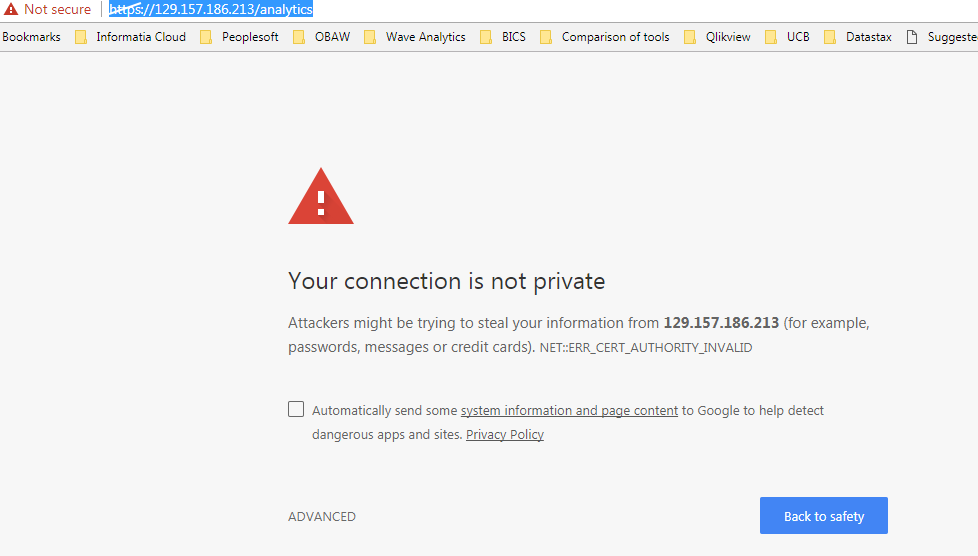
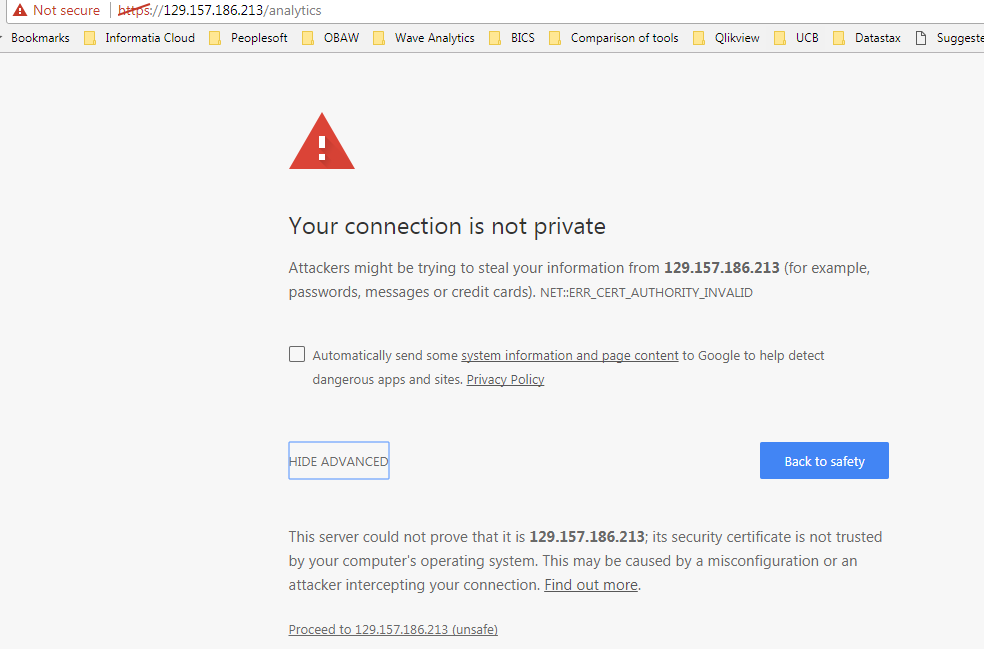
You should see a popup as shown below. If it isn�t secure then click on ADVANCED option and open the page.
Click the following link for details:
Creating Oracle Analytics Cloud Service
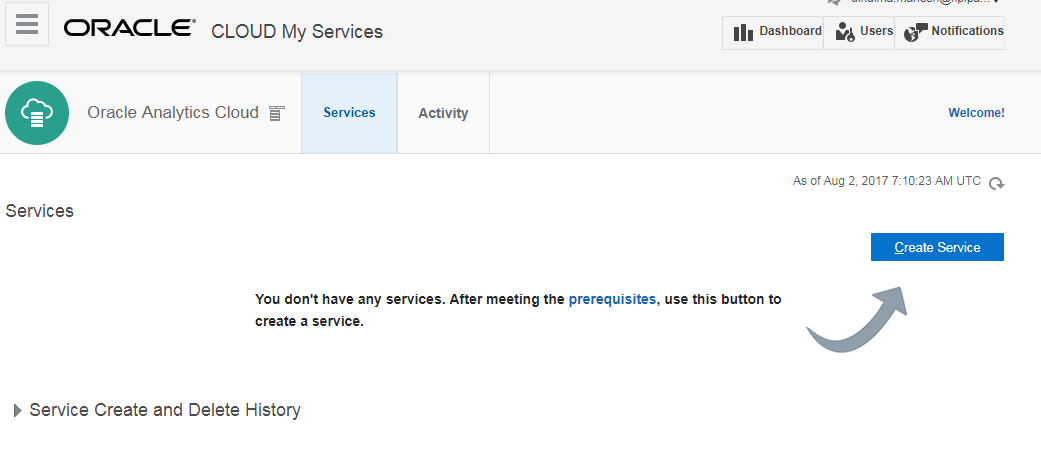
Click Create Service
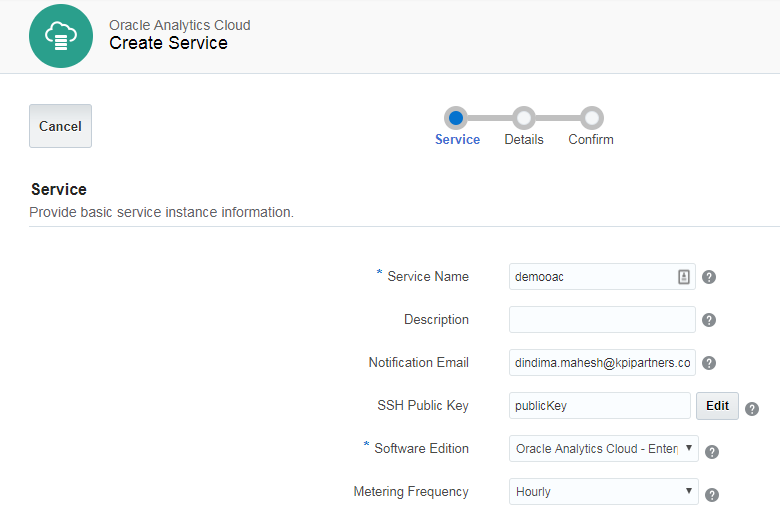
SSH public key can be the same as the database SSH public key. Click Next.
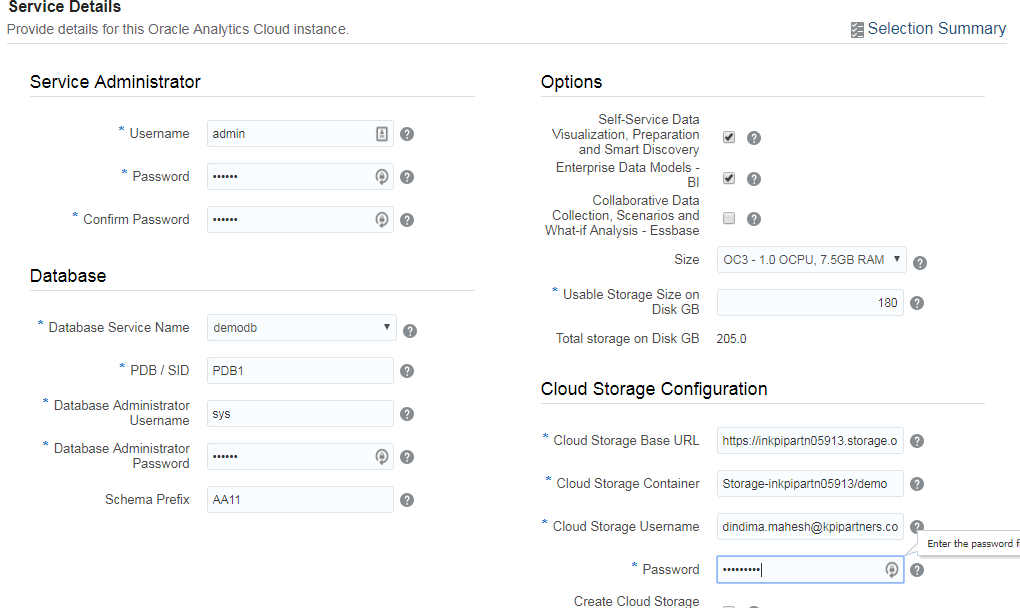
Admin password Enter the password to access Analytics. This password wasn't set earlier.
Database password Created earlier while creating the database service
Select the first two Options
Cloud storage base URL: https://inkpipartn05913.storage.oraclecloud.com/v1
Click Next
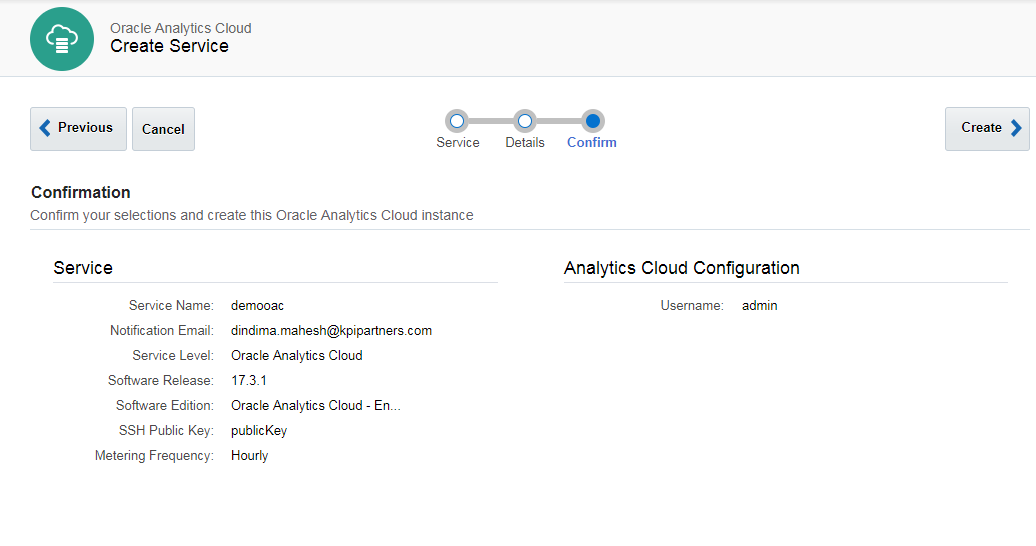
Click Create Service
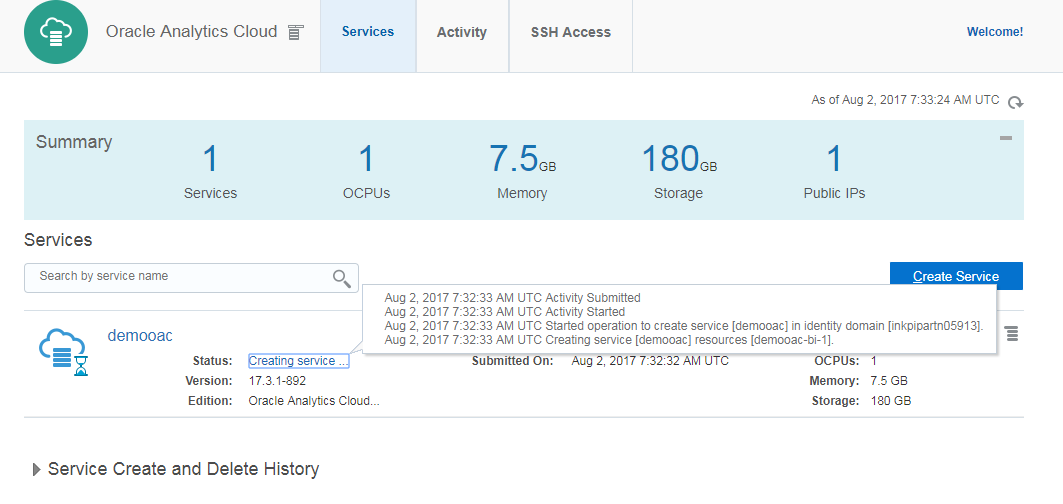
Creating Service message is displayed
It takes approximately 40 minutes to create the service and you will be notified via email once the service is created

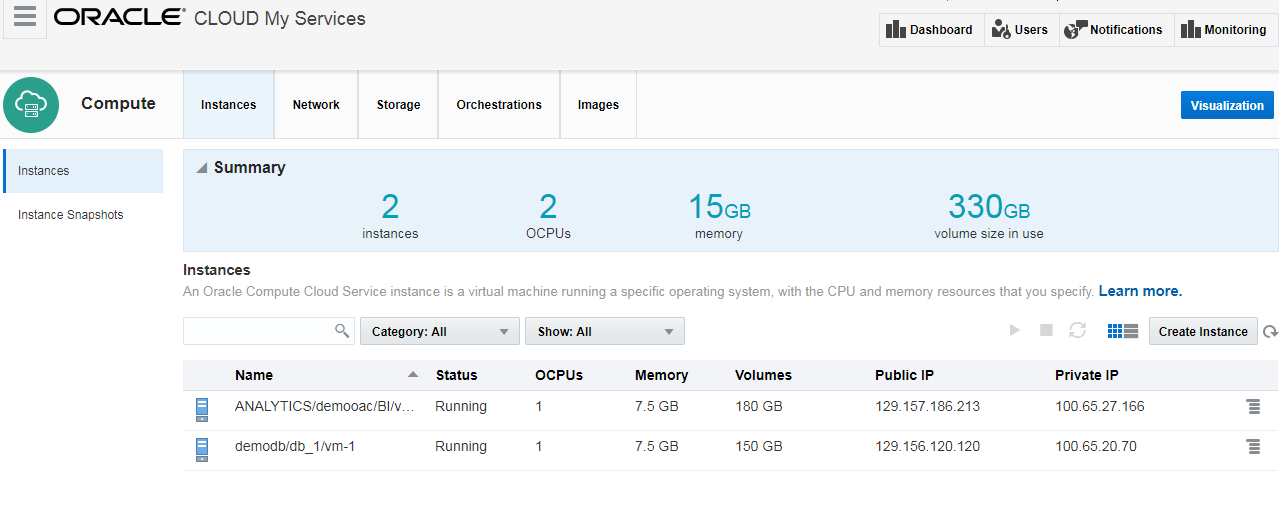
Under Compute, there are two instances that are created with different IPs
We can stop or restart any service that has been created
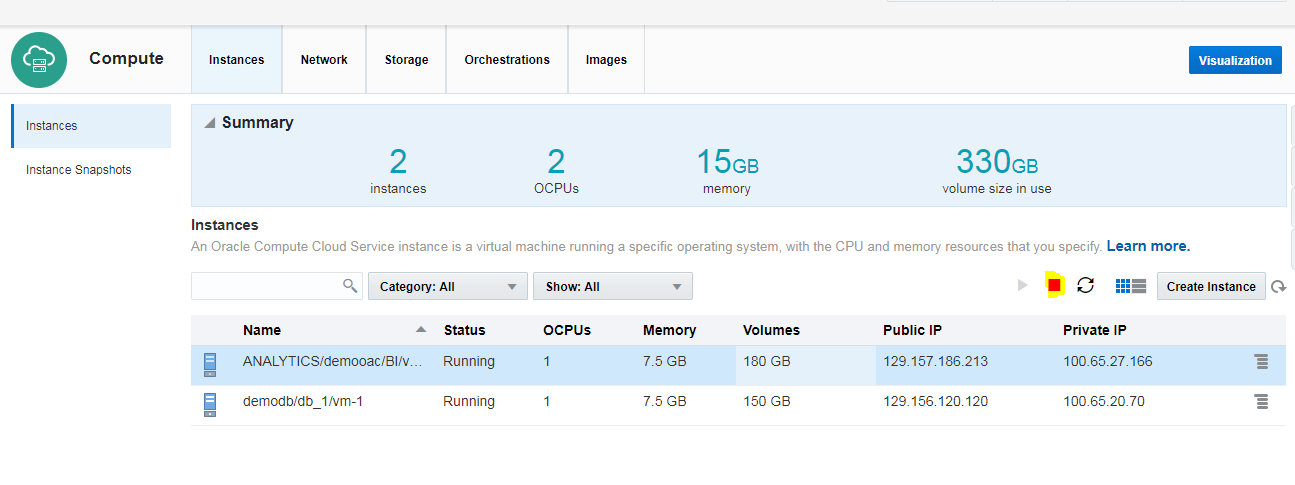
The Compute section shows which services were created and in what instances
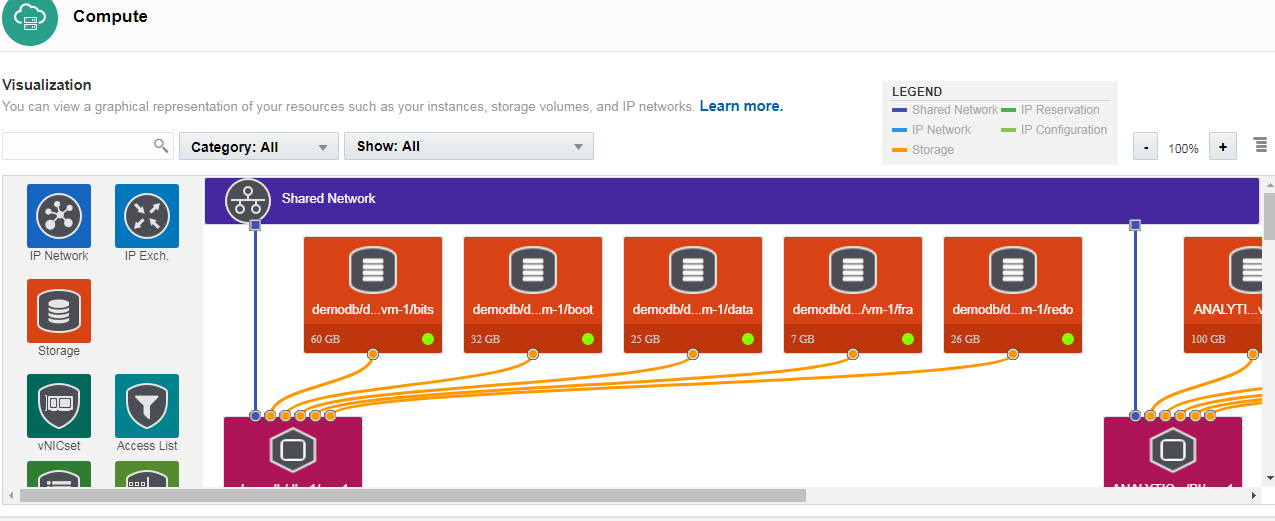
Click Visualization to see the graph of all the services and their IPs created in the cloud
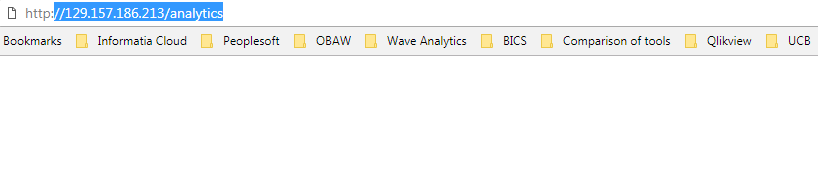
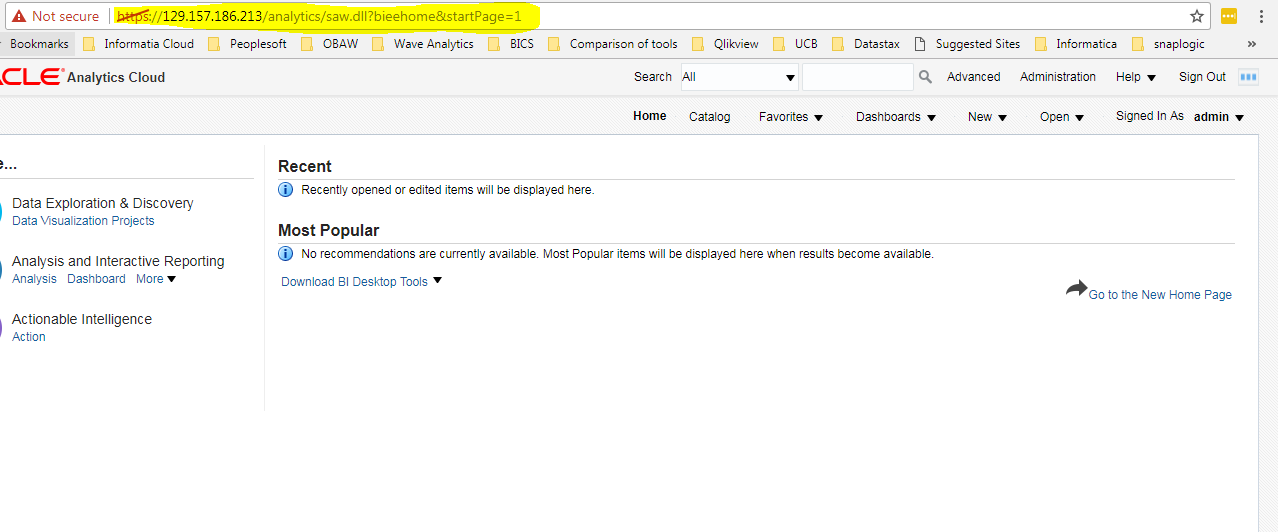
Now that OACS has been created, click the following link to access the analytics page
http://publicip/analytics
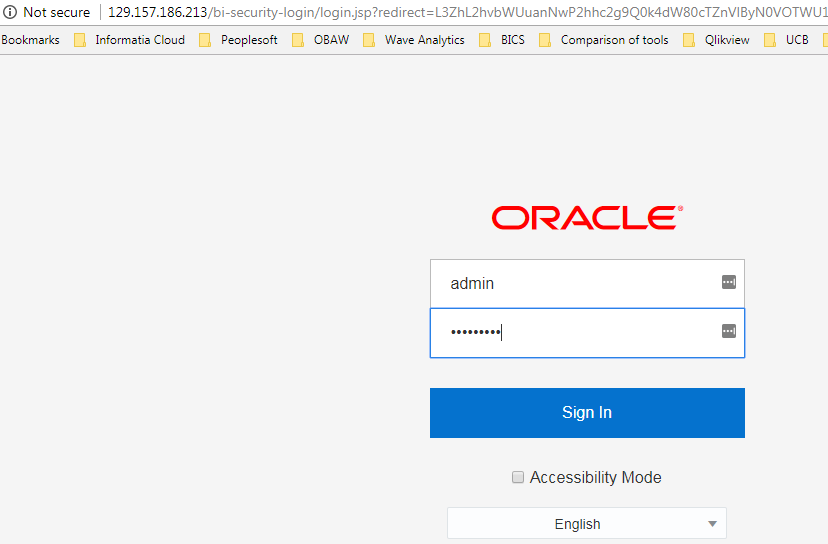
The Public IP is 129.157.186.213
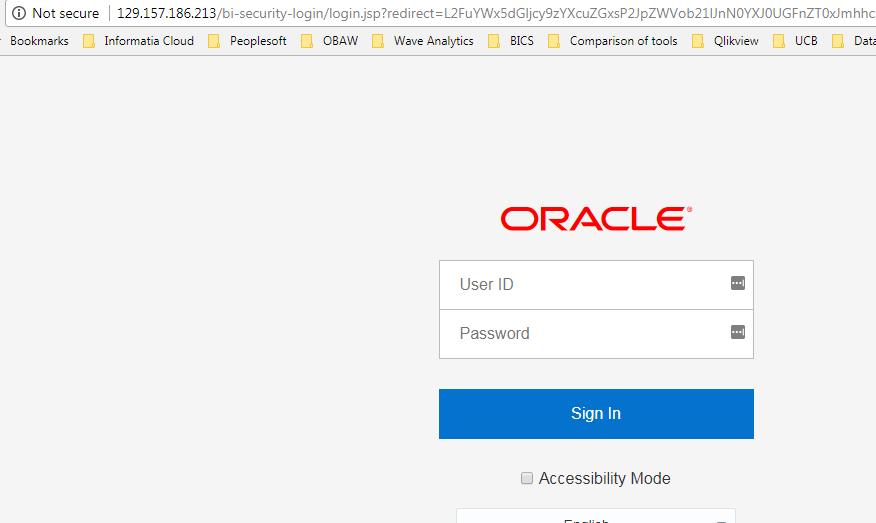
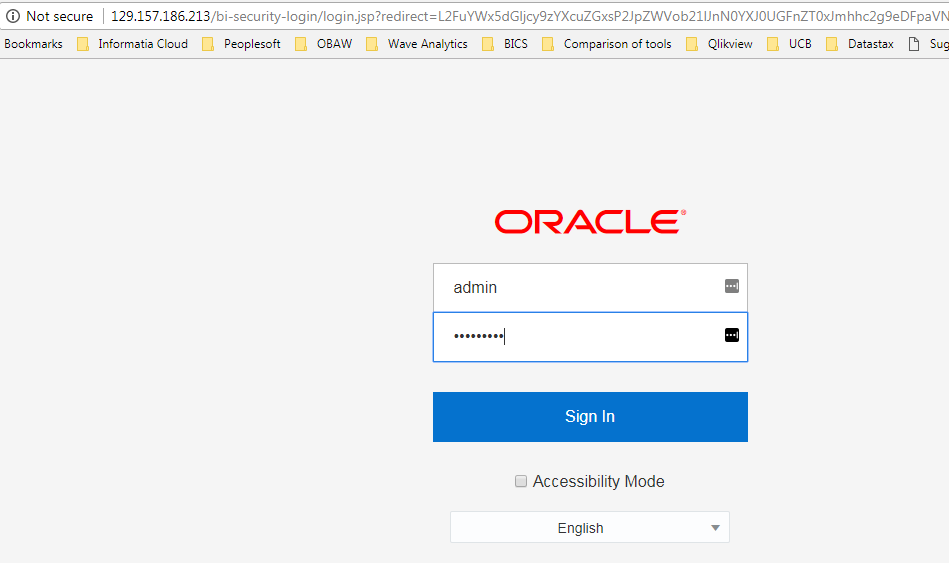
Enter the username and password given while creating OACS
The version of OBIEE is 12.2.2.0.0 (Build BIPS-20170417212246 64-bit)
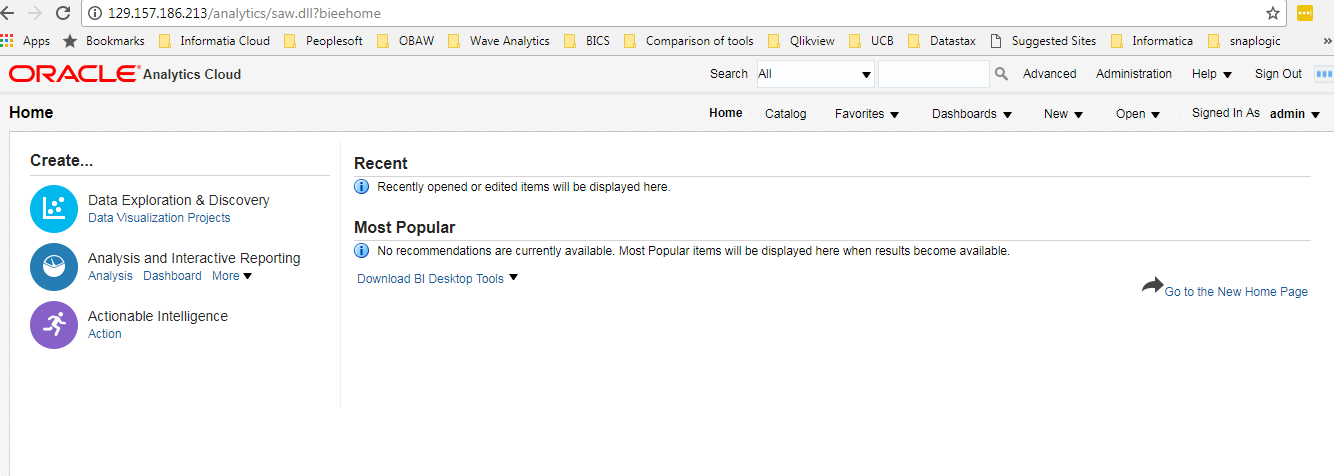
You can access analytics by following the screenshots shown below
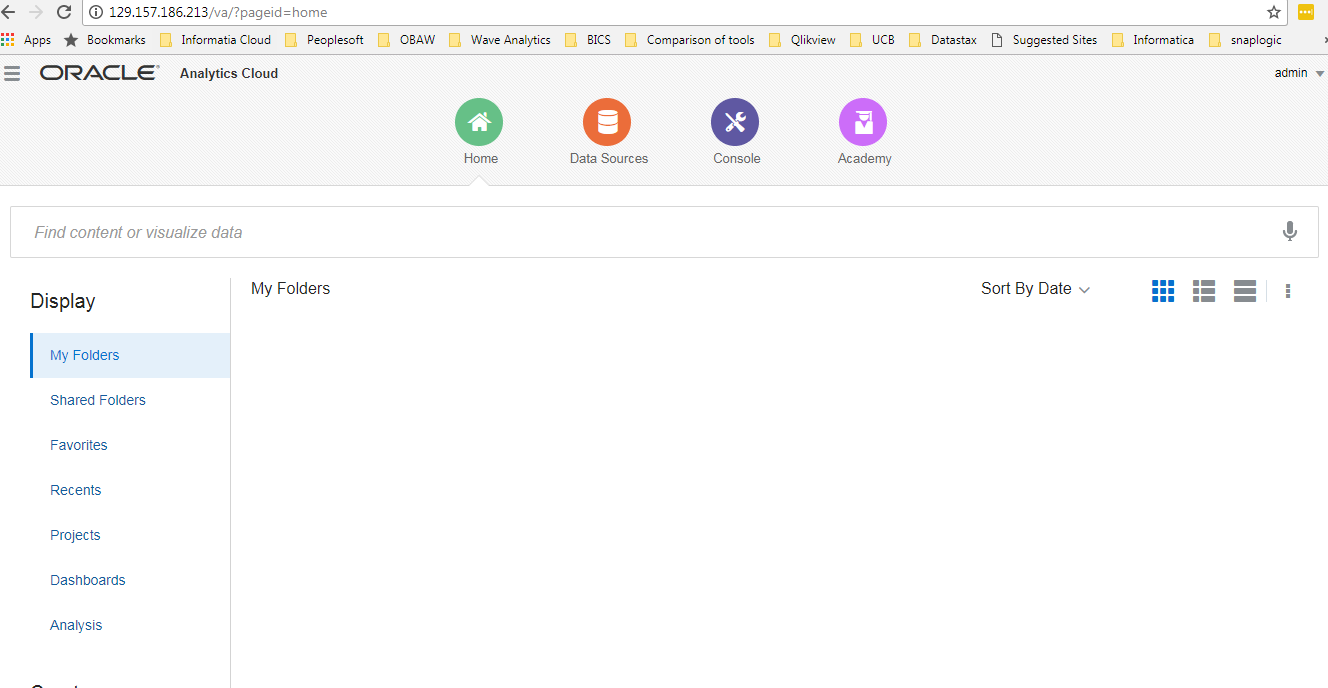
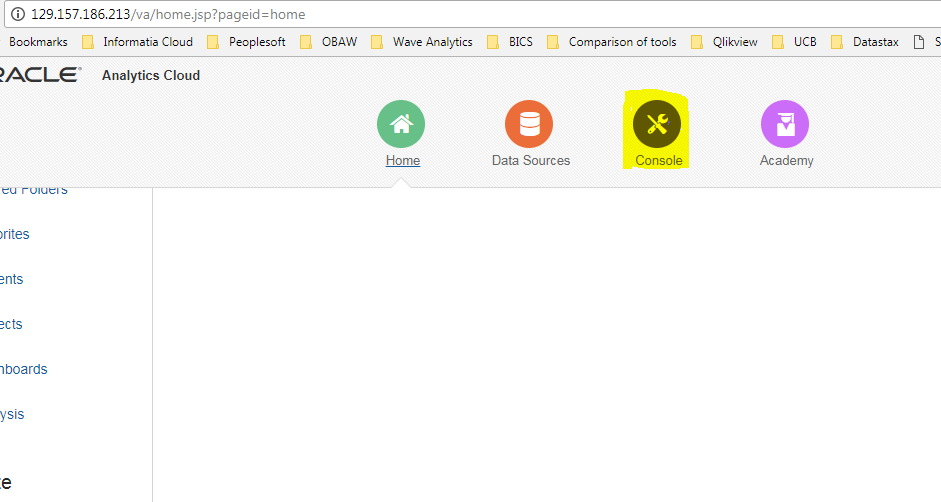
Click http://129.157.186.213/va to access visualization
You won't be able to access the Essbase page as we didn't select the option while creating OACS
http://129.157.186.213/essbase
Port for OBIEE and Visual Analyzer is 80 (443 for secure)
Enterprise Manager and Console are blocked by default. The port for these is 7001.
For production sever, deploy the security certificate using the following link:
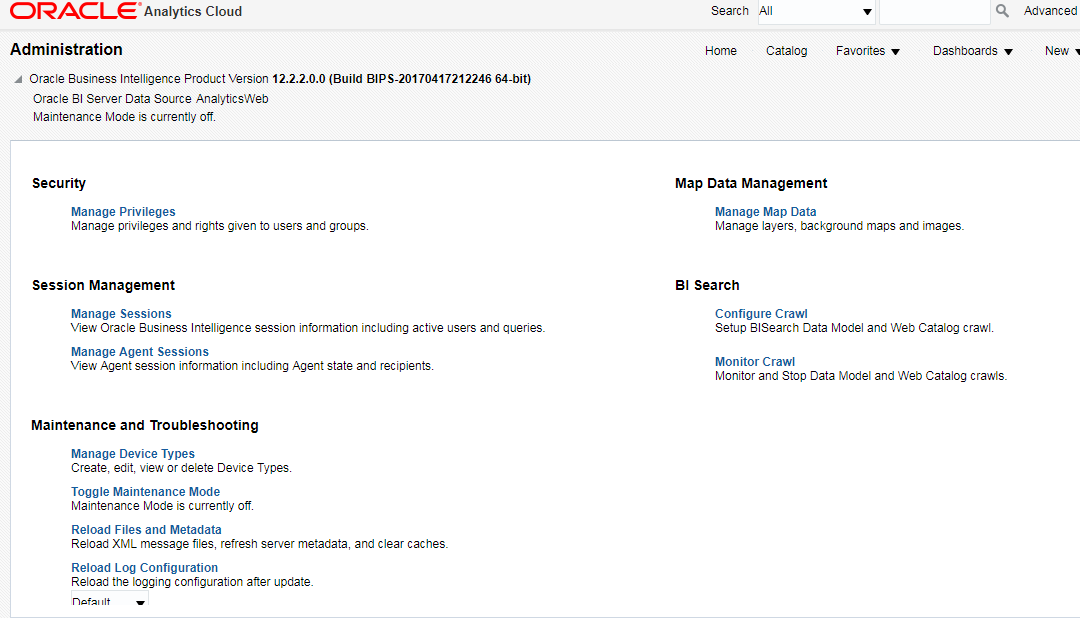
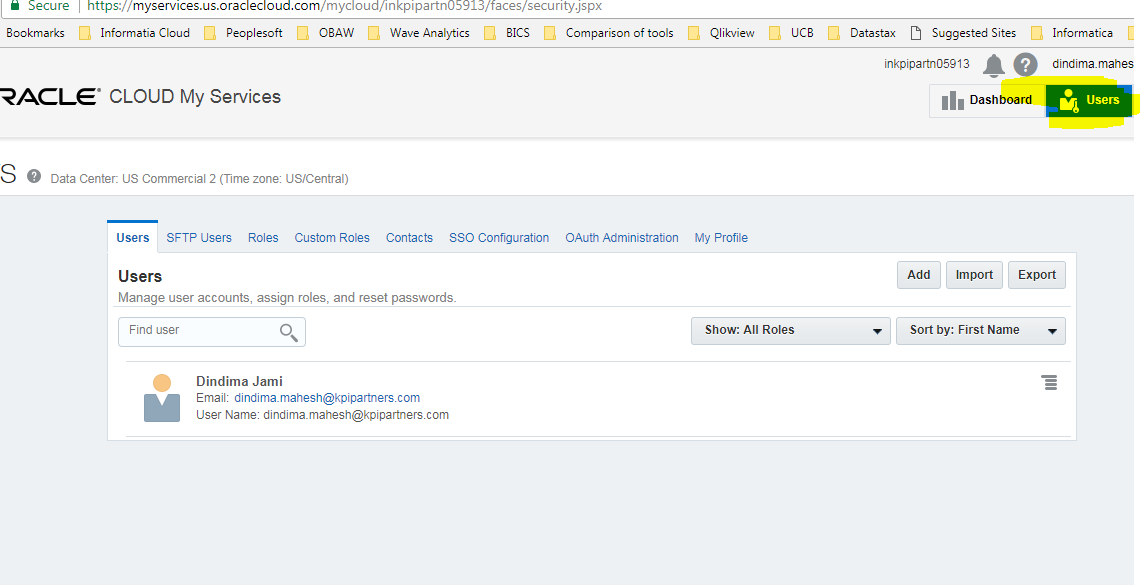
Click �Users� to add more users from this admin account
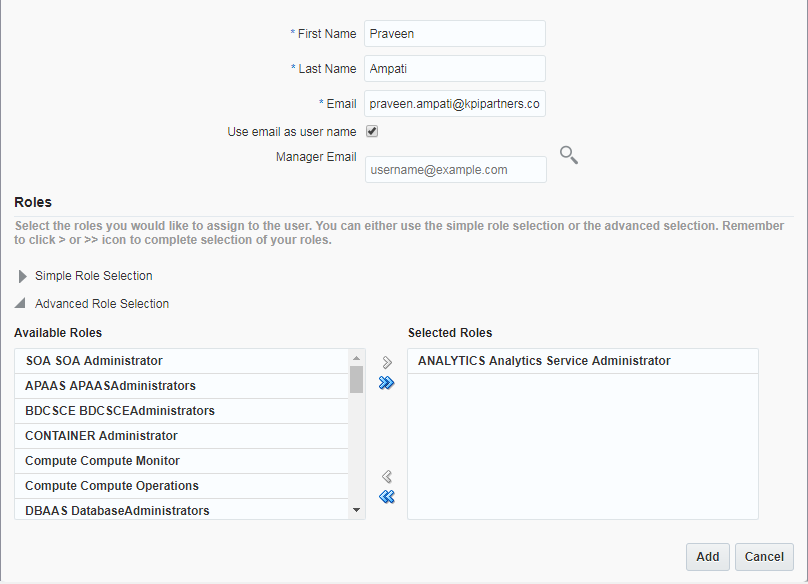
Specify the username, role and email address while creating a new user and click Add. A mail will be sent to the added user.
The added user will receive an email with the account information
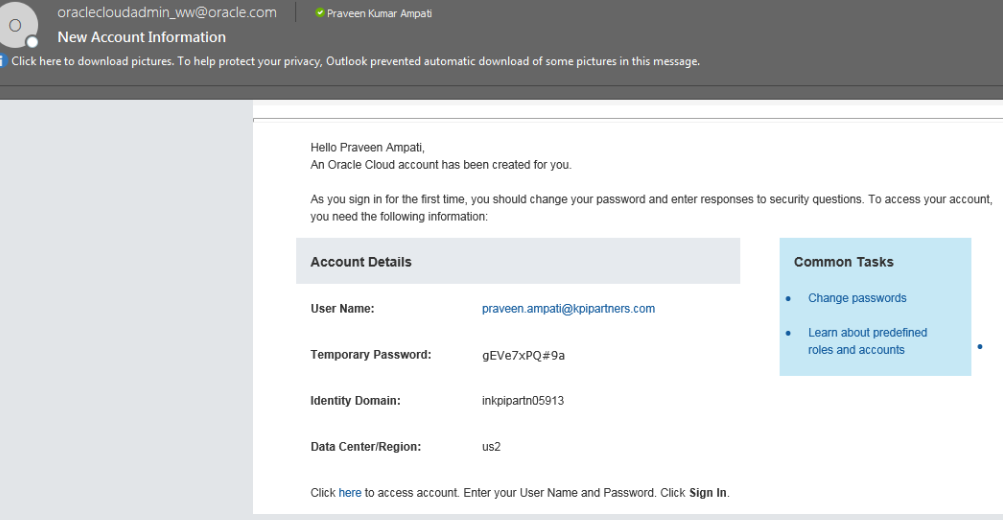
After clicking the Click here to access account, enter the username and temporary password as mentioned in email. After clicking Submit, the user can change the password and security questions.
You can access only the service for which a role is assigned. This can be seen in the cloud dashboard. If the added user is an administrator he can create the service to which he's assigned but cannot create other services. The added user is only an account in the cloud which means that in the above screenshot, Praveen is assigned the role of Analytics Service Administrator but he will not be able to access OBIEE. He will just see the OACS that has already been created and he can create a new OACS.
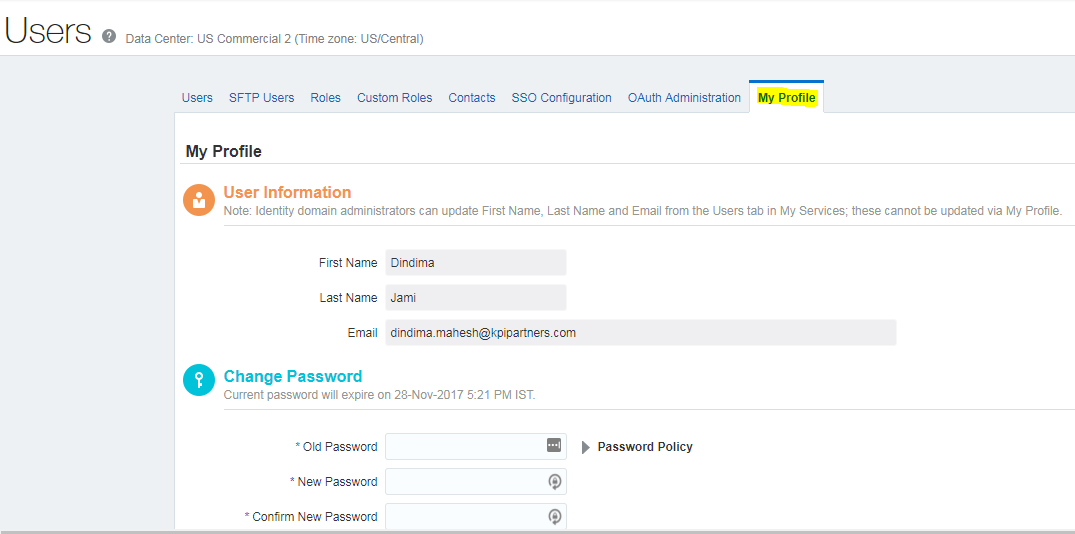
Changing the cloud account password
The password and security questions can be changed here
Uploading RPD to cloud
Note: OBIEE 11.1.1.6 and later editions
Login to the Oracle Cloud account and setup Virus Scanner to make your Analytics Cloud virus free
- Open the visualization link http://129.157.186.213/va
- Click Console
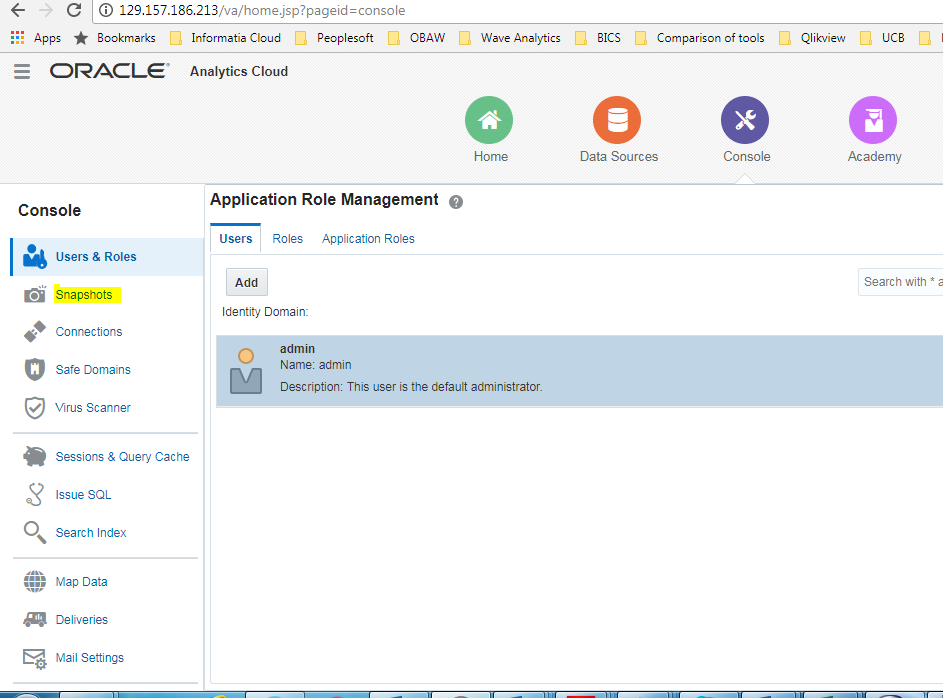
- Select Snapshots from the left pane
- Click Replace Data Model
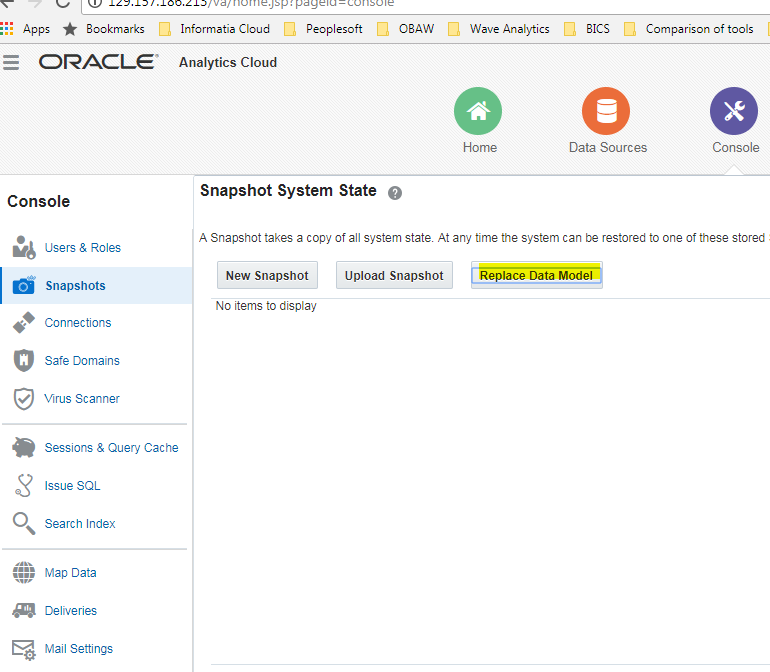

- Chose the .rpd file and enter the repository password
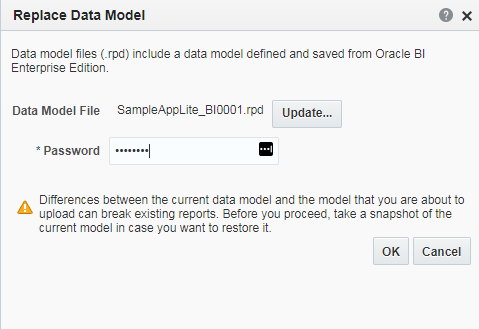
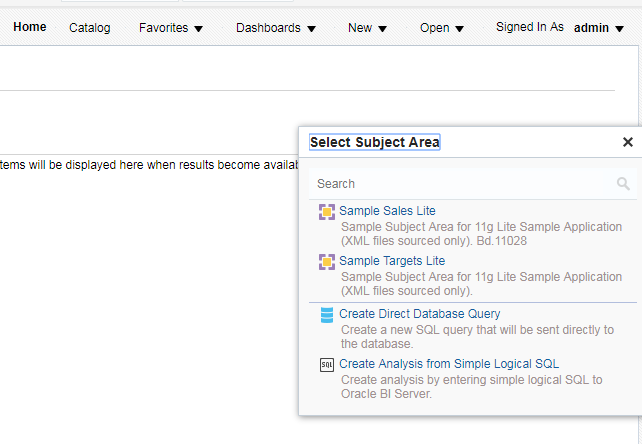
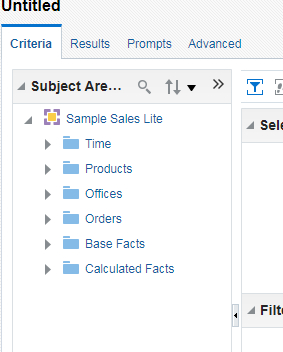
- Login to the analytics page http://129.157.186.213/analytics/ to see the subject areas based on the uploaded .rpd file
Supported browsers for OACS
|
Web Browser |
Version |
|
Microsoft Internet Explorer |
11 and later |
|
Microsoft Edge |
38 and later |
|
Google Chrome |
54 and later |
|
Mozilla Firefox |
45 and later |
|
Apple Safari |
10 and later |
Accessing Oracle WebLogic Console and Enterprise Manager
Access rules need to be applied for Oracle Analytics Cloud Service as shown below
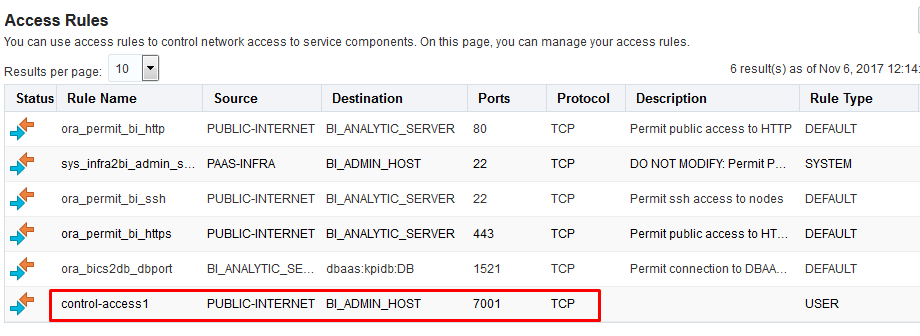
Once this is done, WebLogic Console and Enterprise Manager are accessible. The URLs are in the following format.
Console URL - http://publicip:7001/console
Enterprise Manager URL - http://publicip:7001/em
Summary
The setup process wasn't easy but this blog post will definitely be helpful for anyone who would like to setup an OBIEE instance in the cloud.
Note: Some of the screenshots or content shown in this blog post may not look the same as Oracle may update the UI in future releases.
Dindima Mahesh Jami is a Senior Manager with expertise in Informatica, Informatica Cloud, Oracle BI Applications, OBIEE and 13 years of experience in Data Warehousing.