by Imtiyaz Basha
Step-by-Step Upgrade to OBIEE 11.1.1.7.1
Step 1
Download each of patch file for 16556157, 16569379, 17004920, 17220944
|
Patch File |
Description |
||||||||||||
|
16556157 |
This is an OBIEE 11.1.1.7.1 patch set of 6 patch files, which is almost 2.2 GB in its size. The 6 sub patches are described in the following table.
|
||||||||||||
|
16569379 |
Dynamic Monitoring Service patch. It is platform dependent. |
||||||||||||
|
17004920 |
This patch includes updates to enable support of Oracle BI Mobile App Designer in the Oracle BI Enterprise Edition web catalog and user interface. |
||||||||||||
|
17220944 |
Actual BI Mobile App Designer app patch. |
Step 2
Stop All OBIEE system components including weblogic server in the order shown below:
- BI System Components
On UNIX:
Navigate to <prod_mwhome>/instances/<instance>/bin
Enter the following at the command prompt:
./opmnctl stopall
On Windows:
Navigate to Windows Start > Programs > Oracle Business Intelligence > Stop BI Services
- Weblogic Managed Servers
On UNIX
Navigate to prod_mwhome/user_projects/domains/<domain_name>/bin
Enter the following at the command prompt:
./stopManagedWebLogic.sh bi_server1
- WebLogic Administration Server
On Unix
Navigate to prod_mwhome/user_projects/domains/<domain_name>/bin
Enter the following at the command prompt:
./stopWebLogic.sh
Step 3
Take a backup of Oracle BI system which includes RPD files, catalog files and config files.
Step 4
Copy downloaded patch files into Oracles BI home directory. Unzip 16556157 patch set in Oracle BI Home directory.
Step 5
Open the command prompt and set the environmental variable in the following way.
|
Windows |
Unix (Command Shell) |
|
set ORACLE_HOME=<ORACLE_HOME> set PATH=%ORACLE_HOME%\bin;%PATH% set JAVA_HOME=%ORACLE_HOME%\jdk set PATH=%JAVA_HOME%\bin;%PATH% set PATH=%ORACLE_HOME%\OPatch;%PATH%
|
setenv ORACLE_HOME $PWD setenv PATH $ORACLE_HOME/bin:$PATH setenv JAVA_HOME $ORACLE_HOME/jdk setenv PATH $JAVA_HOME/bin:$PATH setenv PATH $ORACLE_HOME/OPatch:$PATH |
Step 6
Use Opatch apply command on each directory to install the patch or use Opatch napply to install all at once. Following are the example syntaxes:
opatch apply 16453010 (if you are in parent directory 16453010)
opatch apply 16453010 (if you are in the same directory)
opatch napply -silent %PATCH_FOLDER% -id 16453010,16842070,16849017,16850553,16869578,16916026,16569379
* Apply Opatch for 16569379, at this point.
Step 7
Verify that all your patches are installed properly by using opatch lsinventory.
Step 8
Copy the BIPublisherDesktop32.exe and BIPublisherDesktop64.exe files from the <Oracle BI Home>\clients\bipublisher\repository\Tools directory to the prod_mwhome\user_projects\domains\bifoundation_domain\config\bipublisher\repository\Tools directory.
Step 9
Check whether the jsp_servlet directory associated with Oracle BI Publisher exists or not, if it exists then delete it. Usually the directory exists in following path.
user_projects/domains/bifoundation_domainservers/bi_server1/tmp/_WL_user/bipublisher_11.1.1
Verify in each directory under servers/bi_server1/tmp/_WL_user/bipublisher_11.1.1.
Step 10
With the availability of Oracle Business Intelligence Enterprise Edition (OBIEE ) release 11.1.1.7.1, it will no longer be possible to make use of the default Oracle Smart View client installer which is available through the Oracle BI EE Home Page. For this release only, it will be necessary to access an updated version of the Oracle Smart View client installer version 11.1.2.3.000_16909989 (from My Oracle Support).
This updated version can be used to replace the default Oracle Smart View installer in the default OBI EE Home Page location.
32Bit OS: /<middleware>/Oracle_BI1/clients/epm/SmartView/SmartView.exe
64Bit OS: /<middleware>/Oracle_BI1/clients/epm/SmartView/SmartView-x64.exe
- Make backup copies of smartview.exe and version.xml before deploying the replacement files.
- Download the Smart View zip file from My Oracle Support.
- Unzip the file.
- Copy smartview.exe and version.xml to the location of the Workspace installation, typically :\Oracle\Middleware\EPMSystem11R1\common\epmstatic\wspace\SmartVie
Step 11
Start up Admin Server, Managed Server, and OPMN. Login to OBIEE and check the new version:

Step 12
If OBIEE installed properly then GOTO Step 8, to shut down the Oracle OBIEE System.
Step 13
Once the system is down, go back to the command prompt. (If you have already closed it open the new prompt and redo the Step 5, setting up environmental variables).
Step 14
Unzip 17004920, go into extracted directory and run Opatch apply
Step 15
Unzip 17220944, go into extracted directory and run Opatch apply
Post OBIEE Installation Steps / Oracle BI Mobile App Designer Installation
Step 16
Deploying Oracle BI-MAD. Go to the <Oracle BI HOME>/common/bin and run config.sh or config.bat. This will open the Weblogic Configuration window.
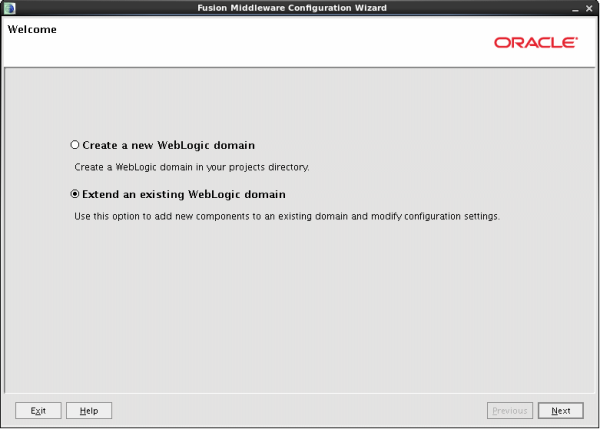
Select an existing Weblogic domain, and then click on "Next."
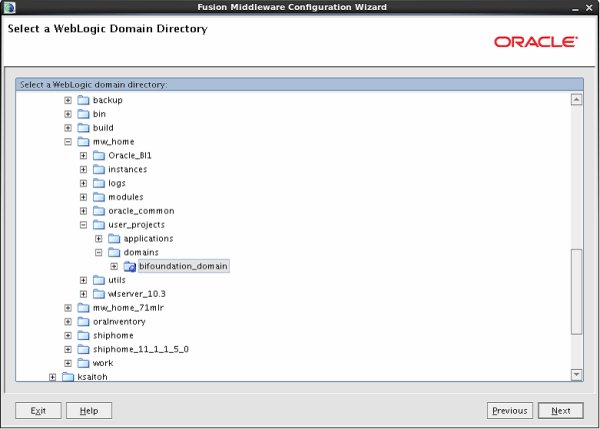
Select bifoundation_domain, and then click on "Next."
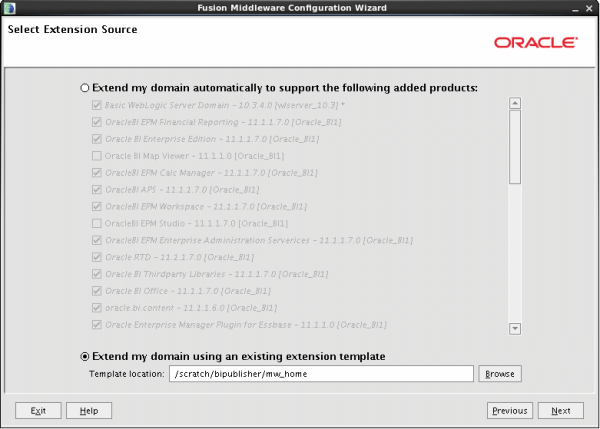
Select "Extend my domain by using an existing extension template."
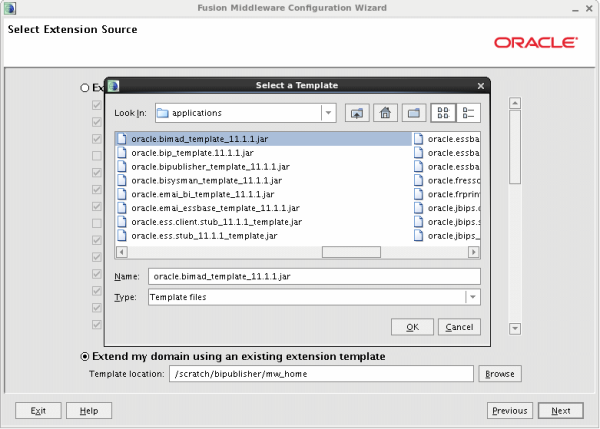
Browse for template location. You can find the template at: <mw_home>/Oracle_BI1/common/templates/applications/oracle.bimad_template_11.1.1.jar, Select and click "Next." It will list the JDBC data sources.
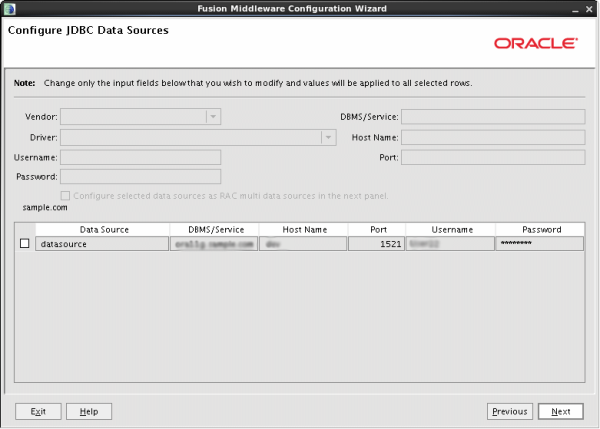
Click "Next." This will take you to the Test JDBC Data Sources.
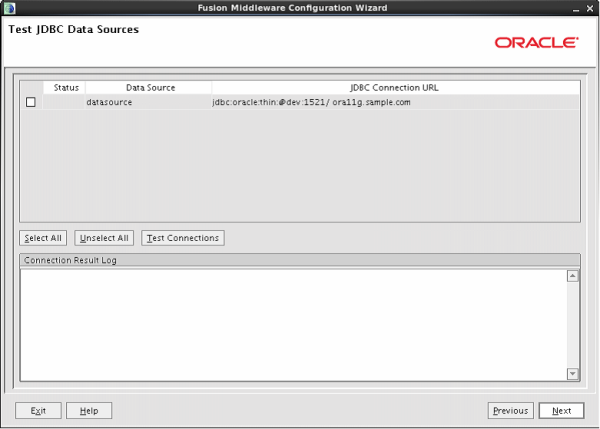
Click "Test Connection." This will show the result in Connection Result Log area. Click "Next." This will take you to the JDBC Component Schema screen
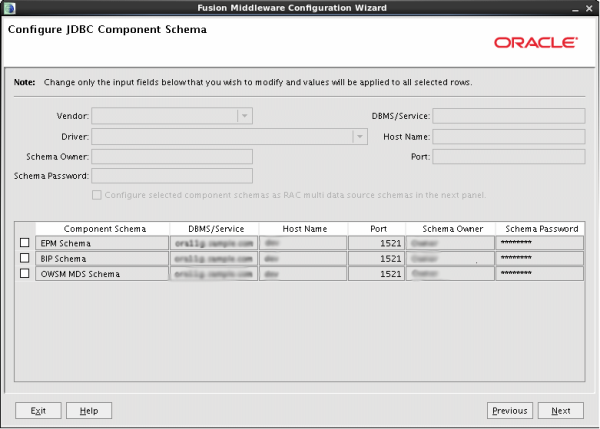
Click "Next" to go to the Test JDBC Component Schema screen.
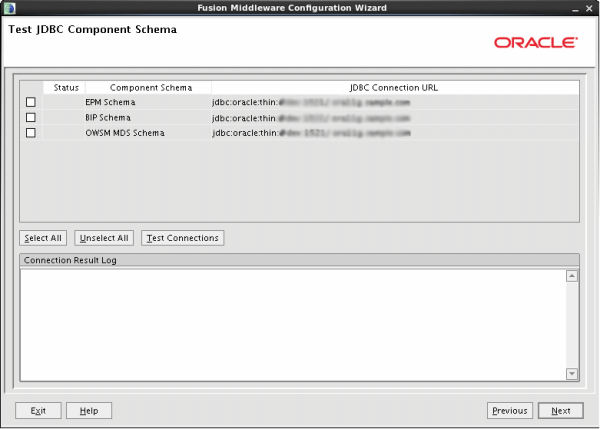
Click "Next" to go to Select Optional Configuration screen.
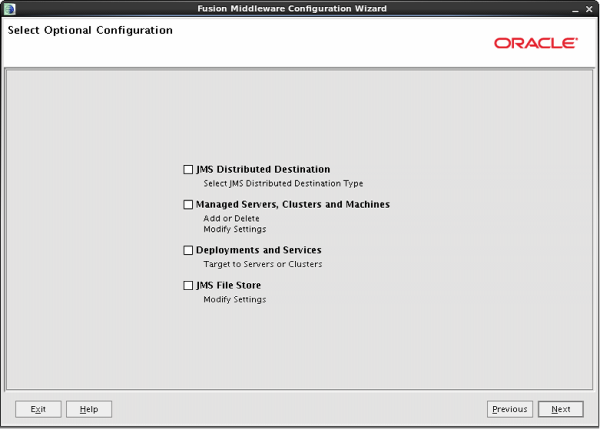
Do not select any additional configuration. Click "Next."
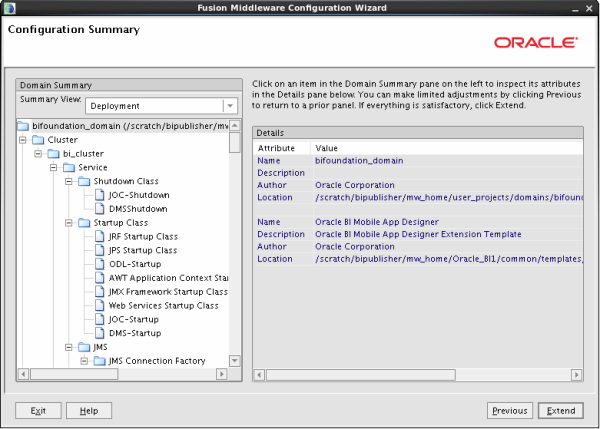
Do not do anything on this screen. Click "Extend" to proceed.
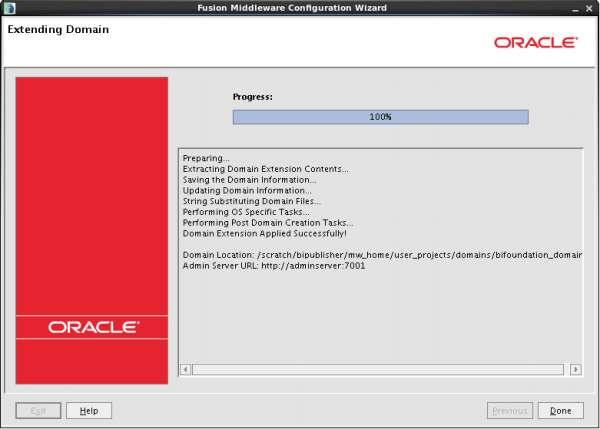
Wait until the progress reaches to 100%. Click "Done" to complete the setup.
Step 17
- Update Security Configuration for Oracle BI Mobile Application Designer.
- For updating the security settings for BI MAD we need to run a python script addMADCodeGrants.py, which will update system-jazn-data.xml
- Before running this script Start Weblogic Server (but not the managed servers or OBIEE).
- To start weblogic server go to: <obiee_home>\user_projects\domains\bifoundation_domain\bin
- Run startWebLogic.cmd for Windows and startWebLogic.sh for Linux. Wait until you see "Started in Running mode" on console.
- Open the command prompt go to the following path: <obiee_home>\Oracle_BI1\bifoundation\install
- Run the following command: <bi_home>\Oracle_BI1\common\bin\wlst.cmd addMADCodeGrants.py t3://<hostname>:7001 <weblogic_admin_name>
- Enter password when prompted. The script execution will be complete in few seconds. Start all the OBIEE services now.
Step 18
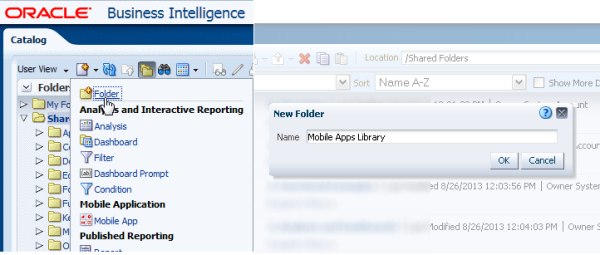
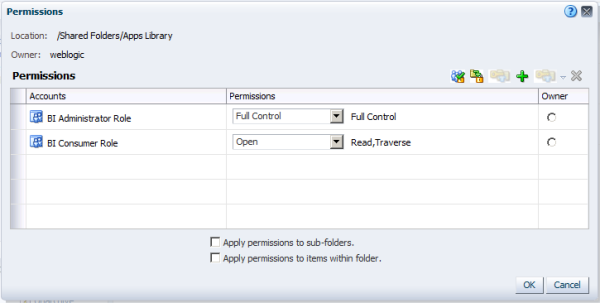
Setting up Apps Library. Log in to OBI, Go to Shared Folder in catalog, Create a new folder.
Once the folder creation is done, set Permissions on the Apps Library folder. App designers must have write permissions enabled so that it can be used for publishing apps to the folder. App consumers should have read permissions so that it can be used to view apps in the library.

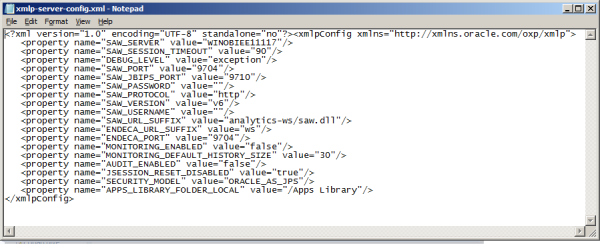
After this, you need to add an entry of this folder name in configuration file. To edit the configuration file go to following folder location: <DOMAIN_HOME>/config/bipublisher/repository/Admin/Configuration
Edit the xmlp-server-config.xml: <property name APPS_LIBRARY_FOLDER_LOCAL" value="/Mobile Apps Library"/>
If your new folder name is something else, then use in value property.
"Save" and "Close" the open file. The Installation of Oracle BI MAD is done.
Once you log in to the BI System, You will your BI Mad tool icons as follows: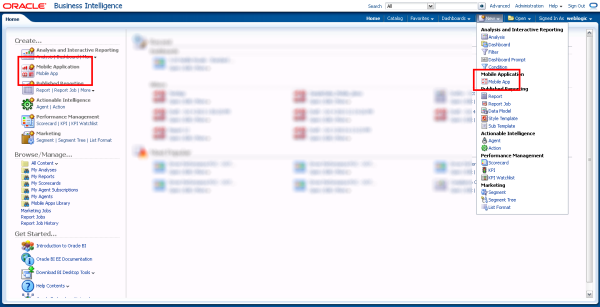
 |
Imtiyaz Basha is a Business Intelligence Consultant at KPI Partners and works with the expert team within the KPI Partners Offshore Technology Center. He is an Oracle Certified Professional whose areas of professional focus also include Hadoop, Java, and Data Science. Check out Imtiyaz's blog at KPIPartners.com. |